Best Postpartum Yoga Poses: Part One
Taking care of your well-being is crucial during this transformative phase of motherhood. One powerful way to support your postpartum journey is through the practice of yoga. In this article, we'll explore a selection of postpartum yoga poses specifically designed for new moms. These poses offer numerous benefits, helping you regain strength, relieve stress, enhance flexibility, and promote relaxation.
Benefits of Postpartum Yoga
Practicing yoga postpartum offers a wide range of benefits for new moms. Here are some key advantages to consider:
Restoring Core Strength: Pregnancy and childbirth can weaken the core muscles. Postpartum yoga poses help activate and strengthen the abdominal muscles, promoting core stability and supporting overall posture.
Relieving Stress and Anxiety: Yoga incorporates deep breathing techniques and mindful movement, which can reduce stress and anxiety levels. It provides a nurturing space for new moms to find calm amidst the demands of motherhood.
Enhancing Flexibility: Pregnancy hormones can loosen the joints and ligaments, making it important to regain healthy flexibility postpartum. Yoga poses gently stretch and open tight areas, improving overall flexibility and joint mobility.
Promoting Relaxation and Better Sleep: The relaxation techniques practiced in yoga, such as deep breathing and guided meditation, can help new moms unwind, promote better sleep, and improve overall well-being.
Assisting in Postpartum Recovery: Postpartum yoga poses stimulate blood circulation, aiding in the healing process after childbirth. They also focus on strengthening the pelvic floor, which is essential for postpartum recovery and preventing issues like urinary incontinence.

Child's Pose
Child's Pose, also known as Balasana, is a restorative and comforting yoga pose that promotes relaxation, releases tension in the back, hips, and shoulders, and provides a sense of grounding. It is often practiced as a resting pose during a yoga sequence or as a gentle stretch on its own. Here's how to perform the pose:
Begin on your hands and knees, with your knees hip-width apart and your toes touching. Rest the tops of your feet on the mat, allowing them to relax.
Slowly sit back on your heels, while keeping your knees separated. If you find it uncomfortable to sit on your heels, you can place a folded blanket or bolster between your buttocks and heels for support.
As you sit back, lower your torso down towards the floor, folding forward from your hips. Extend your arms forward, allowing your forehead to gently rest on the mat. Your chest should be close to or between your thighs.
Softly release your shoulders towards the ground, allowing them to relax and broaden. You can choose to keep your arms extended or bring them back alongside your body, palms facing up. Find a position for your hands that feels comfortable and supportive.
Take slow, deep breaths as you settle into the pose. With each inhalation, feel your back expand and lengthen, and with each exhalation, surrender into the pose, releasing any tension or stress.
Stay in Child's Pose for as long as feels comfortable, allowing your body to fully relax and rejuvenate. You can remain in the pose for a few breaths or several minutes, depending on your personal preference and the amount of time you have available.
Modifications and variations:
If you have difficulty sitting on your heels, you can place a folded blanket or bolster between your thighs and calves to provide support and elevation.
If your forehead does not comfortably reach the ground, you can rest it on a yoga block, bolster, or stack of folded blankets for added support.
Benefits of Child's Pose:
Relieves stress, anxiety, and fatigue by encouraging deep relaxation and calming the nervous system.
Stretches the hips, thighs, and ankles, helping to release tension and increase flexibility in these areas.
Gently stretches the muscles of the back, including the spine, promoting spinal alignment and relieving discomfort.
Encourages a sense of introspection and surrender, allowing you to connect with your breath, body, and inner peace.
Can be used as a restorative pose during a yoga practice or as a way to take a break and find stillness whenever needed.
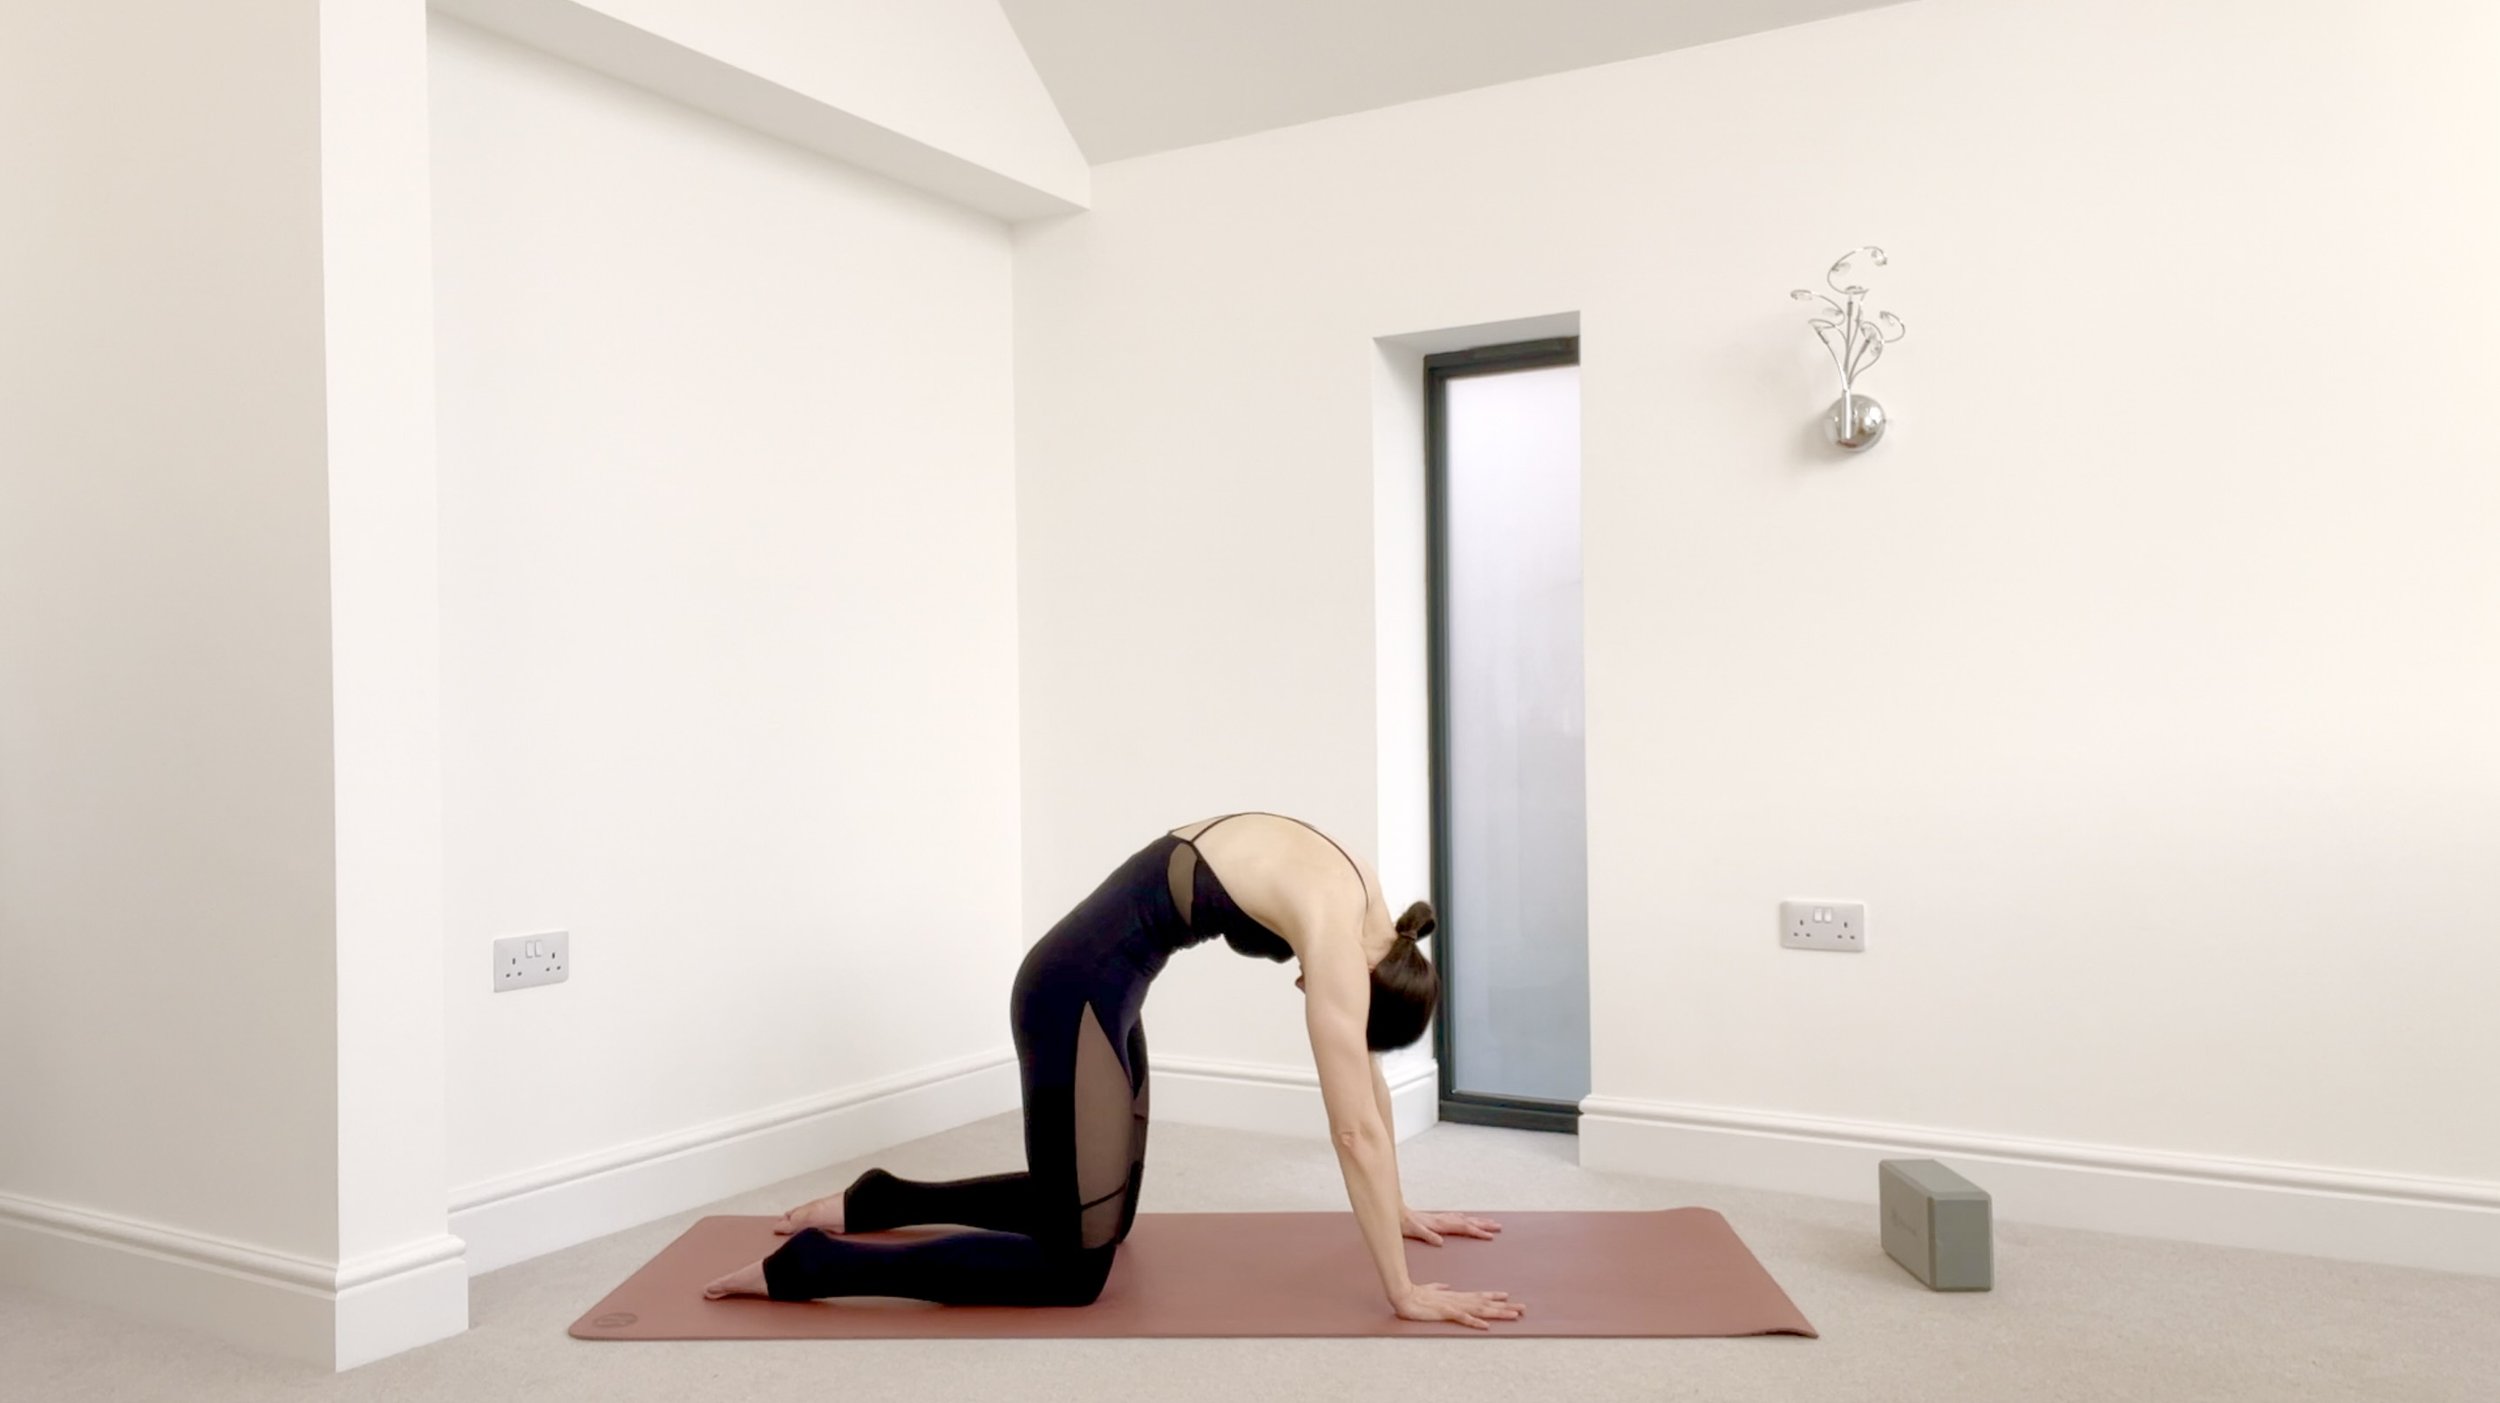
Cat Cow Pose
The Cat Cow Pose, also known as Marjaryasana-Bitilasana, is a gentle and flowing yoga pose that combines two complementary movements. It helps to warm up the spine, improve flexibility, and promote a healthy range of motion. Here's how to perform the pose:

Start on your hands and knees, with your wrists directly under your shoulders and your knees under your hips. Your fingers should be spread wide and pointing forward.
Begin with a neutral spine, ensuring that your back is parallel to the ground. Your head should be in a neutral position, aligned with your spine.
As you inhale, initiate the movement from your tailbone and gently arch your back. Lift your sit bones upward, allow your belly to sink towards the floor, and lift your chest forward. This is the Cow Pose.
As you exhale, round your spine like a cat, starting from the base of your spine. Tuck your tailbone, drop your head, and draw your belly in towards your spine. This is the Cat Pose.
Continue flowing between the Cow Pose and the Cat Pose, syncing your movements with your breath. Inhale as you transition into the Cow Pose, and exhale as you transition into the Cat Pose. Move at a pace that feels comfortable for you.
As you move through the poses, focus on creating a smooth and fluid motion, allowing your breath to guide the movement. Explore the full range of motion in your spine, feeling the gentle stretch and release with each transition.
Modifications and variations:
If you have sensitive knees, you can place a folded blanket or a yoga mat under your knees for additional support and cushioning.
If you have wrist issues, you can perform the pose on your fists or use yoga blocks to elevate your palms.
Benefits of Cat Cow Pose:
Increases spinal flexibility and mobility by gently stretching and articulating the entire length of the spine.
Strengthens and tones the abdominal muscles, helping to improve core stability and posture.
Stretches the muscles of the chest, shoulders, and neck, reducing tension and promoting relaxation in these areas.
Stimulates the flow of cerebrospinal fluid, which nourishes and lubricates the spinal discs, promoting spinal health.
Enhances body awareness and mindfulness, as the synchronized movement with breath encourages a sense of grounding and presence.

Downward Facing Dog Pose
The Downward Facing Dog pose, also known as Adho Mukha Svanasana in Sanskrit, is a foundational yoga pose that is commonly practiced and highly beneficial. It resembles an inverted V-shape, with the hands and feet forming the base, and the hips lifted towards the ceiling. Here's how to perform the pose:
Start on your hands and knees, with your wrists directly under your shoulders and your knees under your hips. Your fingers should be spread wide and pointing forward.
As you exhale, tuck your toes under and lift your knees off the ground, straightening your legs. Gently begin to lift your hips upward, creating an inverted V-shape with your body.
Press firmly into your palms, grounding through your fingers and knuckles. Engage your arms and broaden your upper back. Keep your neck relaxed and allow your head to hang naturally.
Maintain a slight bend in your knees if needed, especially if you feel tightness in the hamstrings. The focus should be on lengthening the spine and finding length from your tailbone to the crown of your head.
Firmly press your heels toward the ground, while keeping your legs engaged and active. However, if your heels don't reach the floor, it's perfectly fine. The goal is to create length and extension throughout the entire body.
Breathe deeply and hold the pose for several breaths, feeling the stretch and release in your back, hamstrings, shoulders, and calves. Allow any tension or tightness to melt away with each exhalation.
Modifications and variations:
If you have wrist issues, you can practice the pose on your forearms instead of your hands. This variation is known as Dolphin pose.
To intensify the stretch in the hamstrings, gently pedal your feet, bending one knee at a time while straightening the other leg.
Benefits of Downward Facing Dog pose:
Stretches and strengthens the entire body, including the arms, shoulders, hamstrings, calves, and arches of the feet.
Improves posture and alignment, as it elongates the spine and helps counteract the effects of sitting or standing for long periods.
Enhances circulation and energizes the body by bringing the head below the heart, which encourages blood flow and revitalization.
Relieves tension in the shoulders, neck, and back, helping to alleviate stress and anxiety.
Builds upper body and core strength, as the pose engages the muscles of the arms, shoulders, and abdomen.

Eagle Arms Pose
Eagle Arms Pose, also known as Garudasana arms, is a yoga posture that focuses on opening the shoulders and upper back while promoting balance and concentration. It mimics the intertwined arms of an eagle and can be practiced both sitting or standing. Here's how to do it:
Start by sitting or standing in a comfortable position with a straight spine and relaxed shoulders.
Extend your arms straight out in front of you at shoulder height.
Cross your right arm over your left arm, bending both elbows. The goal is to have your right elbow resting on top of your left elbow. If possible, bring the palms of your hands to touch. If your palms don't reach, bring the backs of your hands together or simply press the fingertips of each hand together.
Keep your shoulders relaxed and gently draw your hands away from your face, creating a slight stretch in your upper back and shoulders. Lift your elbows slightly to find a comfortable and sustainable position.
Stay in this pose for several breaths, allowing your body to relax and your breath to flow naturally. Maintain a sense of balance and focus as you engage in the pose.
To release the pose, gently unwind your arms and extend them out to the sides, shaking out your hands if needed. Take a moment to notice the effects of the pose on your shoulders and upper back.
Modifications and variations:
If it's challenging to bring your palms together, you can use a strap or a towel to bridge the gap between your hands. Hold onto the strap or towel with each hand and maintain a gentle stretch without straining.
Benefits of Eagle Arms Pose:
Opens the shoulders and upper back, releasing tension and tightness in that area.
Improves flexibility and range of motion in the shoulders and arms.
Helps to correct posture by strengthening the upper back muscles and drawing the shoulder blades together.
Enhances focus and concentration by requiring balance and coordination in the pose.
Relieves stress and anxiety by encouraging deep breathing and promoting a sense of calm and centeredness.
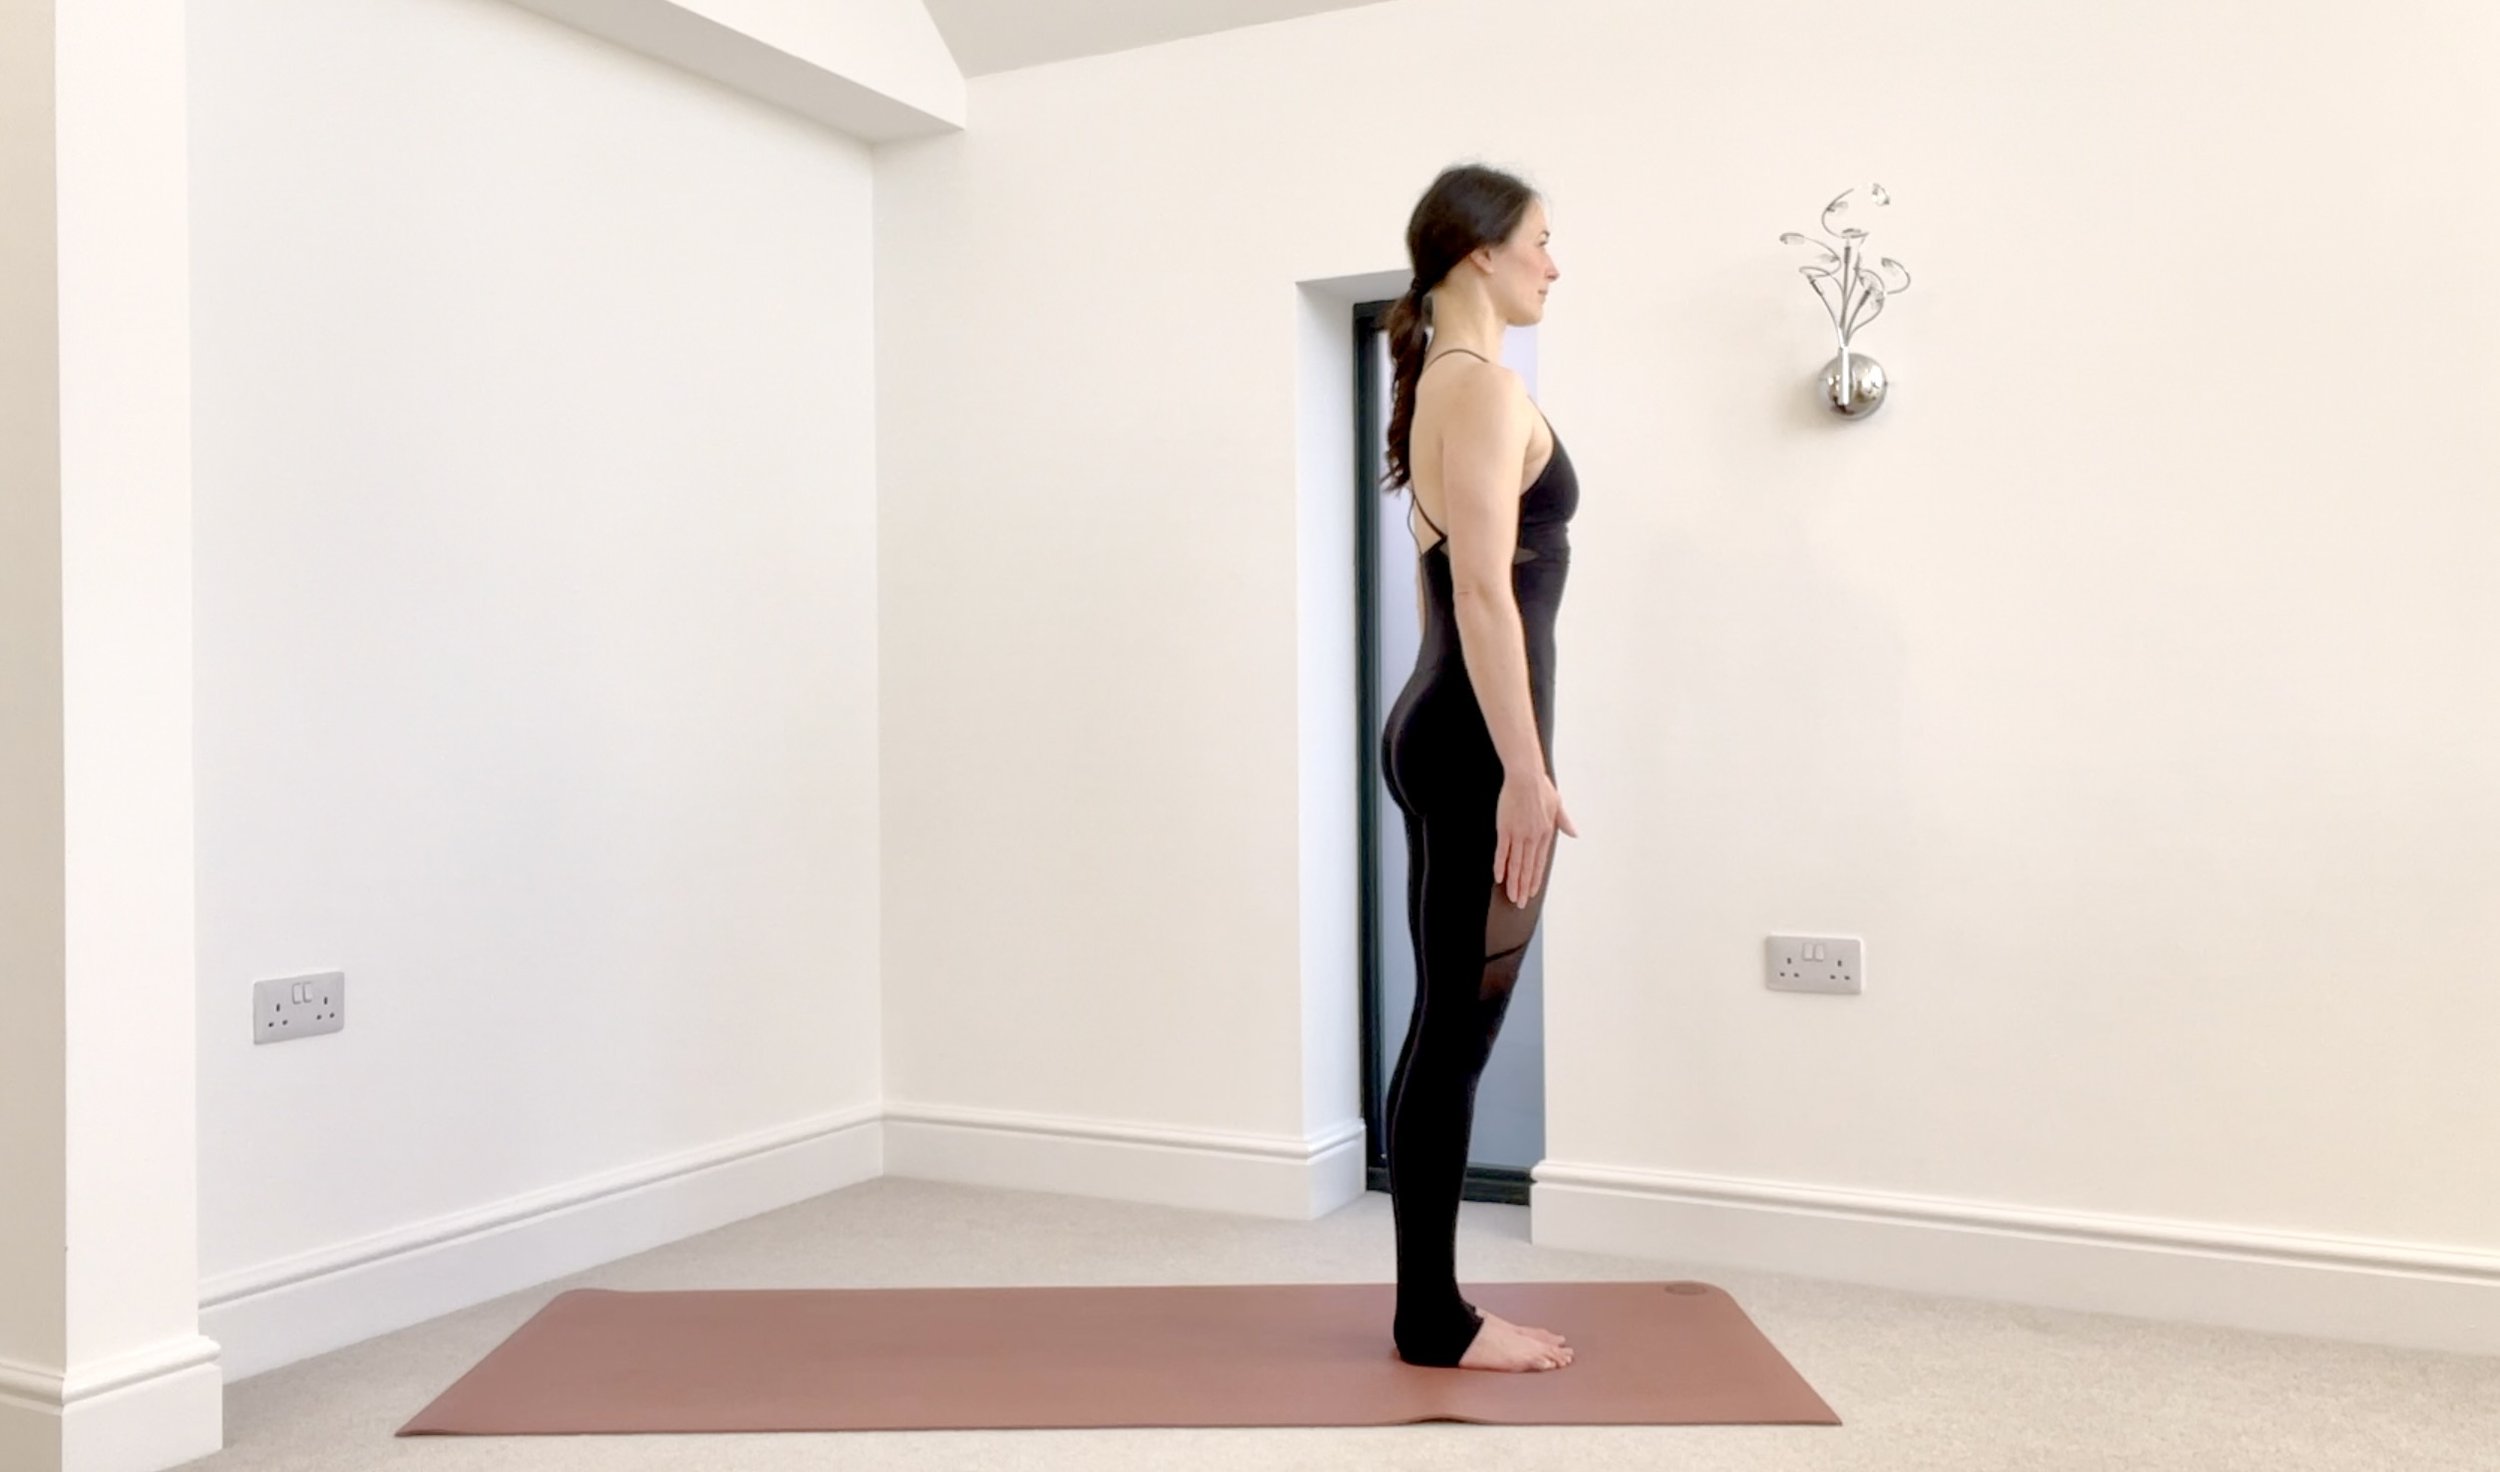
Mountain Pose
Mountain Pose, also known as Tadasana, is a foundational standing pose in yoga that promotes stability, grounding, and body awareness. It may seem simple, but it forms the basis for many other standing poses and helps improve posture and alignment. Here's how to do it:
Stand tall with your feet together or hip-width apart, whichever feels more comfortable for you. Distribute your weight evenly across both feet, grounding through all four corners of your feet.
Engage your leg muscles by gently lifting your kneecaps and firming your thigh muscles. Keep your legs active but not locked, finding a balance between stability and relaxation.
Lengthen your spine by lifting the crown of your head towards the ceiling. Imagine a string pulling you upwards from the top of your head, creating a straight line from your tailbone to the crown of your head.
Relax your shoulders away from your ears, allowing your shoulder blades to slide down your back. Keep your arms relaxed by your sides with your palms facing forward.
Soften your facial muscles, relax your jaw, and maintain a natural, gentle gaze forward. Let your breath flow smoothly, inhaling and exhaling through your nose.
Take a moment to tune in to the sensations in your body. Feel the connection between your feet and the ground, noticing the stability and support it provides. Be aware of your body alignment, ensuring that your spine is straight and your posture is upright.
Stay in this pose for several breaths, maintaining a sense of calm and presence. Use this time to center yourself, focus on your breath, and cultivate a feeling of groundedness and stability.
Modifications and variations:
If it's challenging to balance with your feet together, you can keep them hip-width apart for added stability.
You can also experiment with variations of arm placement. For instance, you can bring your palms together in front of your heart in a prayer position, or extend your arms overhead with your palms facing each other.
Benefits of Mountain Pose:
Improves posture and alignment by bringing awareness to the spine, shoulders, and hips.
Strengthens the legs, ankles, and core muscles, promoting stability and balance.
Enhances body awareness and mindfulness by encouraging a focused and present mindset.
Relieves tension and stress by allowing the body and mind to find a state of calm and relaxation.
Develops a sense of groundedness and stability, helping to cultivate confidence and inner strength.

Beginners modification: hands on hips
Five-Pointed Star Pose
Five-Pointed Star Pose, also known as Utthita Tadasana or Extended Mountain Pose, is a wide-legged standing pose that promotes openness, strength, and grounding. It is a variation of Mountain Pose with a wider stance that provides a sense of expansion and stability. Here's how to do it:
Start by standing at the top of your mat with your feet wider than hip-width apart. Turn your feet out slightly so that they are parallel to each other or pointing slightly outward.
Extend your arms out to the sides, parallel to the floor, with your palms facing down. Keep your fingers active and spread wide, engaging your entire arm.
Ground down through all four corners of your feet, feeling a sense of stability and connection with the earth. Engage your leg muscles by gently lifting your kneecaps and firming your thighs.
Lengthen your spine by lifting the crown of your head towards the ceiling, maintaining a straight line from your tailbone to the top of your head. Relax your shoulders away from your ears, allowing your shoulder blades to slide down your back.
Take a deep breath in, and as you exhale, gently engage your core muscles to support your posture. Imagine a straight line extending from the crown of your head to the soles of your feet.
Relax your facial muscles, soften your gaze, and allow your breath to flow naturally. Find a balance between effort and ease, feeling grounded yet expansive in this wide-legged stance.
Stay in this pose for several breaths, feeling the strength and openness in your body. Embrace the sense of stability and grounding that Five-Pointed Star Pose offers.
Modifications and variations:
If you have any balance concerns or if the wide-legged stance feels challenging, you can place your hands on your hips for added support and stability.
You can also explore variations in arm placement. For instance, you can raise your arms overhead, bringing your palms together in a prayer position or stretching your fingers wide apart.
Benefits of Five-Pointed Star Pose:
Expands and opens the chest, promoting deep breathing and enhancing lung capacity.
Strengthens the legs, ankles, and core muscles, improving overall stability and balance.
Increases body awareness and mindfulness by encouraging a sense of presence and focus.
Stretches the inner thighs, groins, and hips, improving flexibility in those areas.
Promotes a sense of grounding and connection with the earth, fostering stability and confidence.

Standing Forward Bend
Standing Forward Bend, also known as Uttanasana, is a soothing and rejuvenating standing pose that offers a deep stretch to the entire backside of the body. It promotes relaxation, release of tension, and increased flexibility. Here's how to do it:
Begin by standing tall at the top of your mat with your feet hip-width apart. Take a moment to ground yourself, connecting with the earth beneath you.
As you exhale, slowly hinge forward at the hips, allowing your upper body to fold forward. Bend your knees slightly if needed to maintain a gentle stretch in the hamstrings and lower back.
Let your head hang naturally, releasing any tension in your neck and shoulders. Allow your arms to dangle down towards the floor or hold onto opposite elbows for a deeper stretch.
Relax your muscles and surrender to the pose. Let gravity do the work as you aim to bring your torso closer to your legs without forcing or straining.
Soften your breath and find stillness in the pose. With each exhale, imagine tension melting away from your body, allowing for a deeper release.
If it feels comfortable, you can gently straighten your legs, but remember that the primary focus is on relaxation and the stretch in the back of the body.
Stay in this pose for several breaths, allowing the gentle stretch to unfold. Be mindful of your body and modify the pose as needed to suit your flexibility and comfort level.
Modifications and variations:
If you have tight hamstrings or lower back issues, you can keep a slight bend in your knees to ease the intensity of the stretch.
If reaching the floor feels challenging, you can place your hands on blocks, a bolster, or any other sturdy surface that allows you to maintain the forward fold comfortably.
Benefits of Standing Forward Bend:
Stretches the hamstrings, calves, and hips, increasing flexibility and relieving muscle tension.
Releases tension in the back, shoulders, and neck, promoting relaxation and reducing stress.
Calms the mind and soothes the nervous system, helping to alleviate anxiety and mild depression.
Stimulates blood flow to the brain, improving focus, concentration, and mental clarity.
Encourages a sense of surrender and introspection, fostering a connection between body and mind.

Legs Up the Wall Pose
Legs Up the Wall Pose, also known as Viparita Karani, is a soothing and restorative yoga pose where you lie on your back with your legs extended vertically up against a wall. It's a gentle pose that provides deep relaxation for both your body and mind. Here's how to do it:
Find a quiet spot in your home near a wall. Sit comfortably on the floor with one side of your body touching the wall. Take a moment to settle into a relaxed position.
Slowly lie down on your back and gently swing your legs up the wall. Make sure your feet are pointing towards the ceiling. Slide your buttocks as close to the wall as feels comfortable. Adjust your position until you find a cozy spot against the wall.
Let your arms relax by your sides with your palms facing up. Allow your shoulders to relax and sink into the floor. You can keep your arms extended or place them on your belly or chest for extra comfort.
Close your eyes and take slow, deep breaths. Feel your entire body releasing any tension as you surrender to the pose. Notice the gentle stretch in the back of your legs and the opening in your hips. Let go of any stress or worries.
Stay in this pose for 5 to 15 minutes, or as long as feels good for you. Use this time to deeply relax, meditate, or simply enjoy a peaceful rest.
Tips for modifications:
If your hamstrings feel tight or you experience discomfort in your lower back, you can place a folded blanket or cushion under your hips or lower back for support.
If keeping your legs straight against the wall is challenging, it's okay to bend your knees slightly or place a rolled-up blanket or cushion under your thighs to make it more comfortable.
Benefits of Legs Up the Wall Pose:
Promotes relaxation and reduces stress by activating the body's natural relaxation response.
Improves circulation by allowing blood and lymph fluid to flow more easily from your feet and legs back to your heart, reducing swelling and fatigue.
Relieves tension and fatigue in your legs, feet, and lower back, particularly if you've been standing or sitting for long periods.
Calms the mind and enhances mental clarity, making it an excellent pose for reducing anxiety and finding inner peace.
Restores energy levels and promotes an overall sense of well-being, making it a perfect pose to practice at the end of a tiring day or when you're feeling drained.
These yoga poses can be run in sequence for a safe postpartum yoga flow.