Best Postpartum Supine Pilates Exercises
Why Postpartum Pilates?
Postpartum Pilates offers a myriad of benefits tailored to meet the unique needs of new mothers. It combines gentle movements, controlled breathing techniques, and targeted exercises to help you rebuild core strength, restore flexibility, and improve overall posture. This low-impact workout not only promotes physical healing but also enhances mental well-being, alleviating the stresses associated with the demands of motherhood.
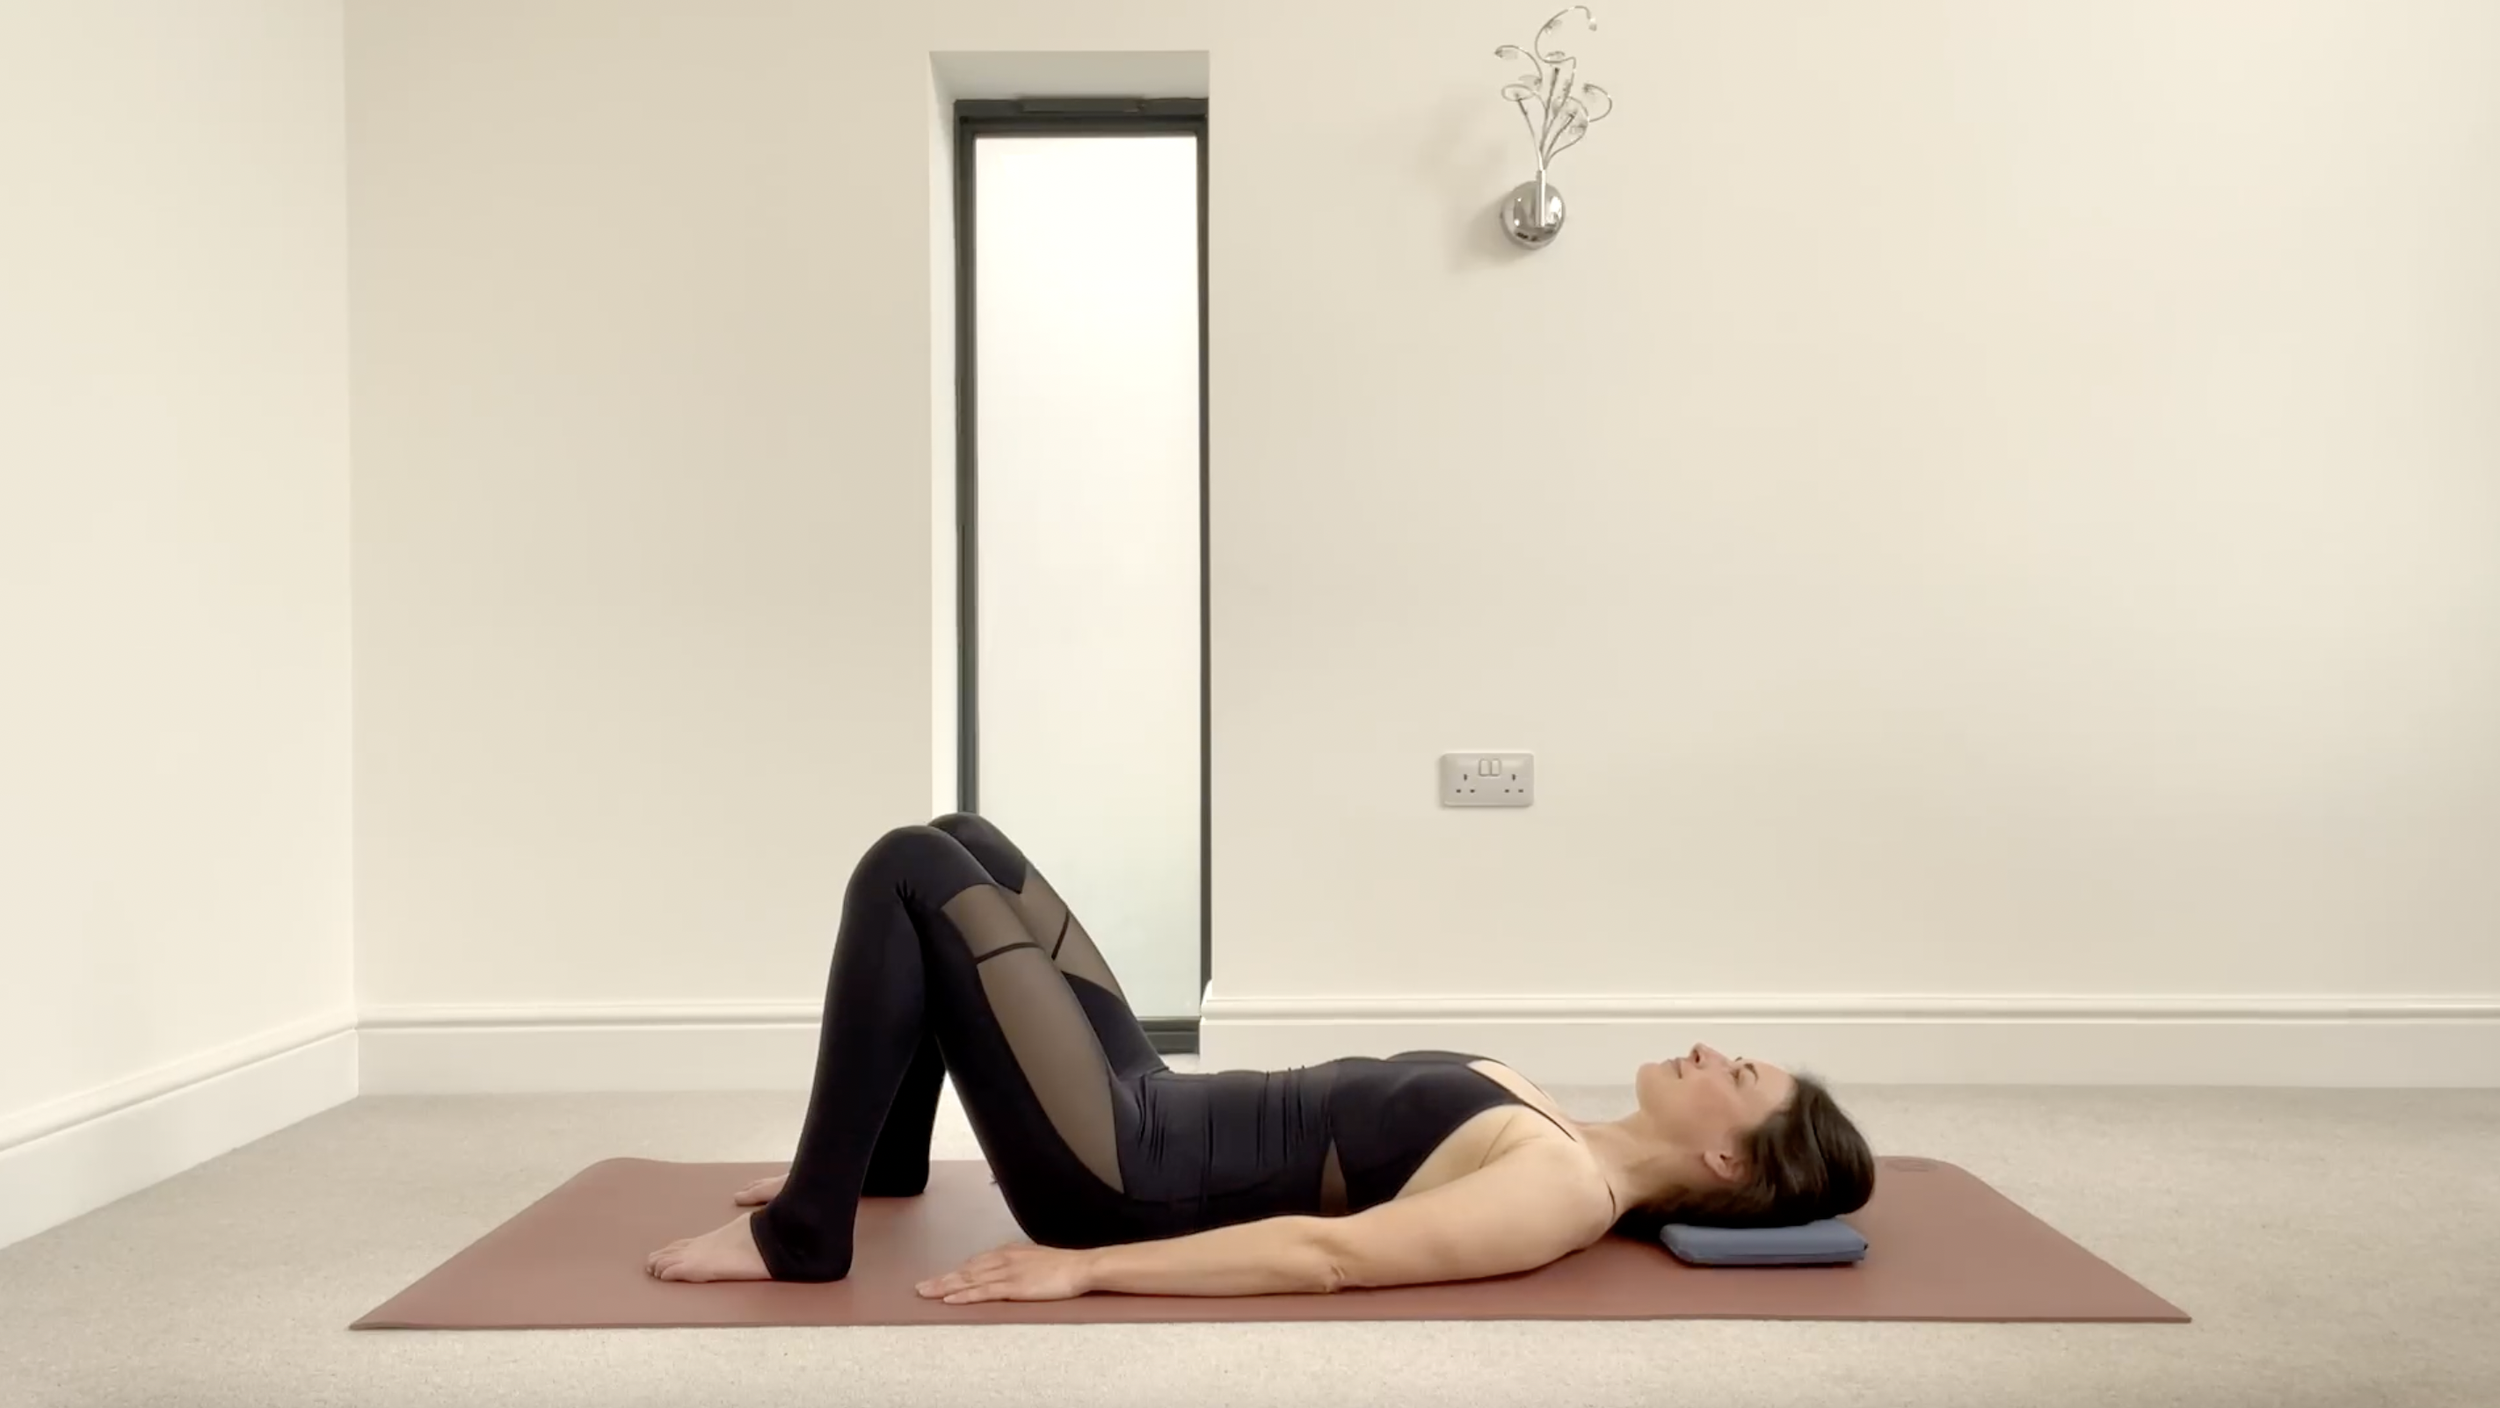
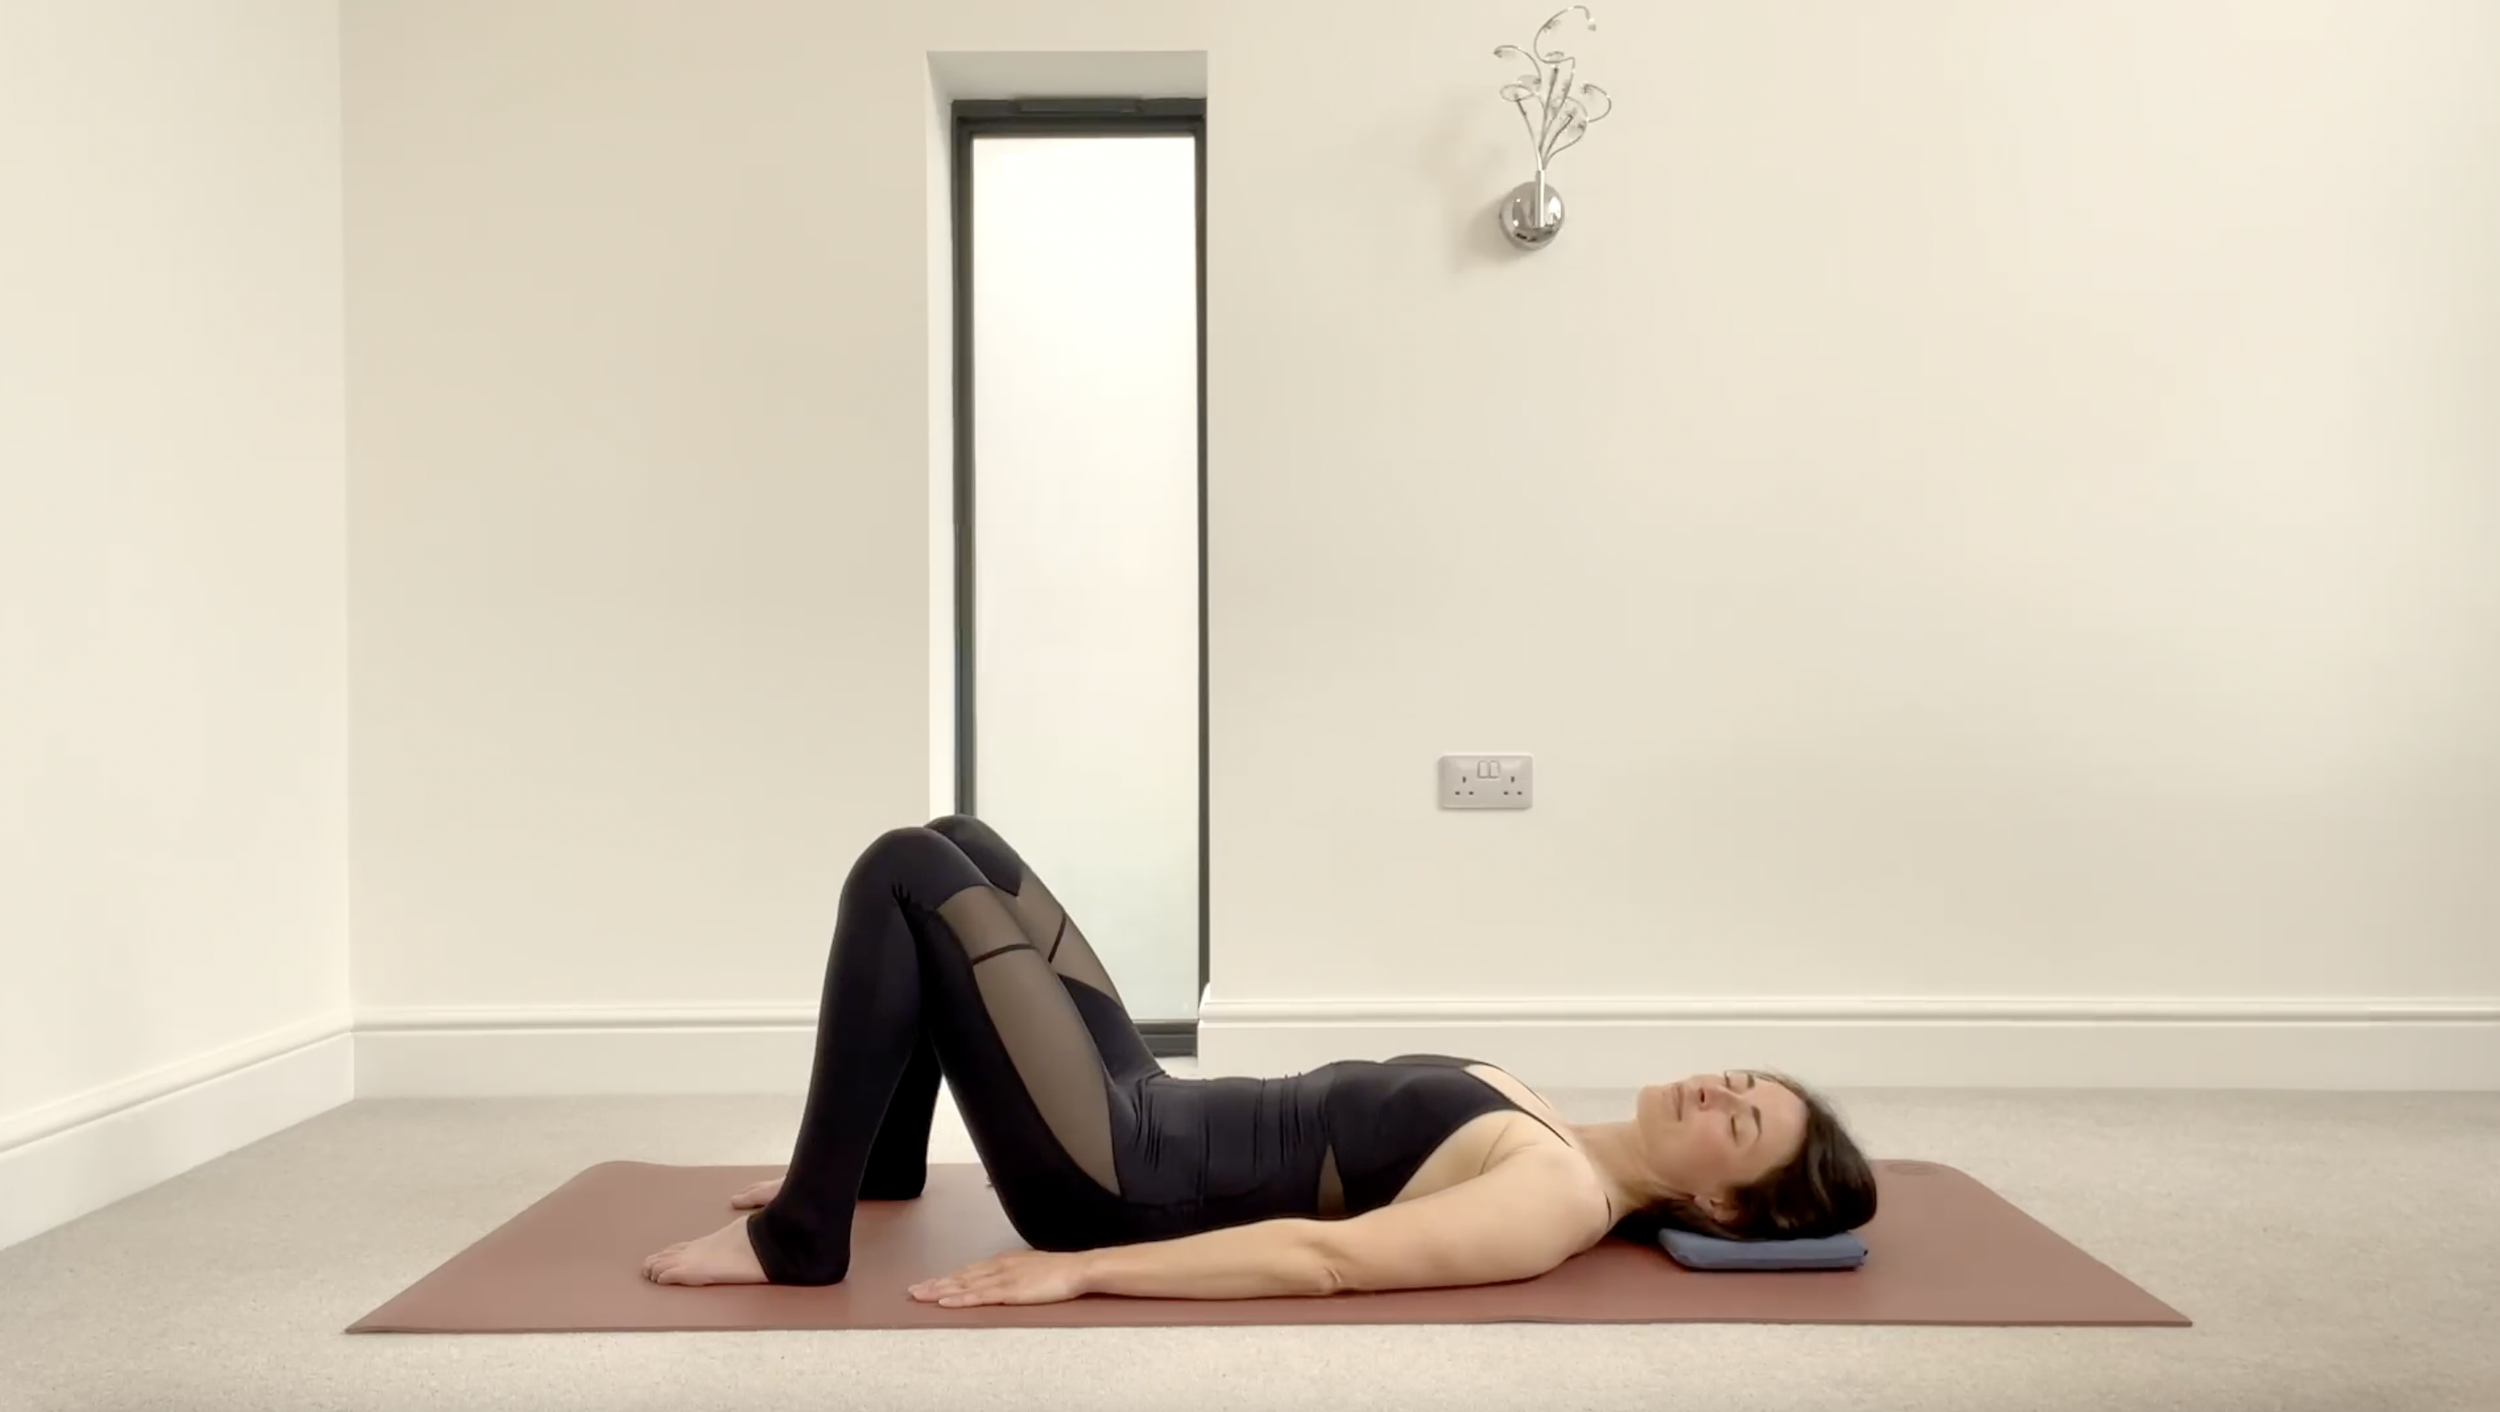
Relaxation Position
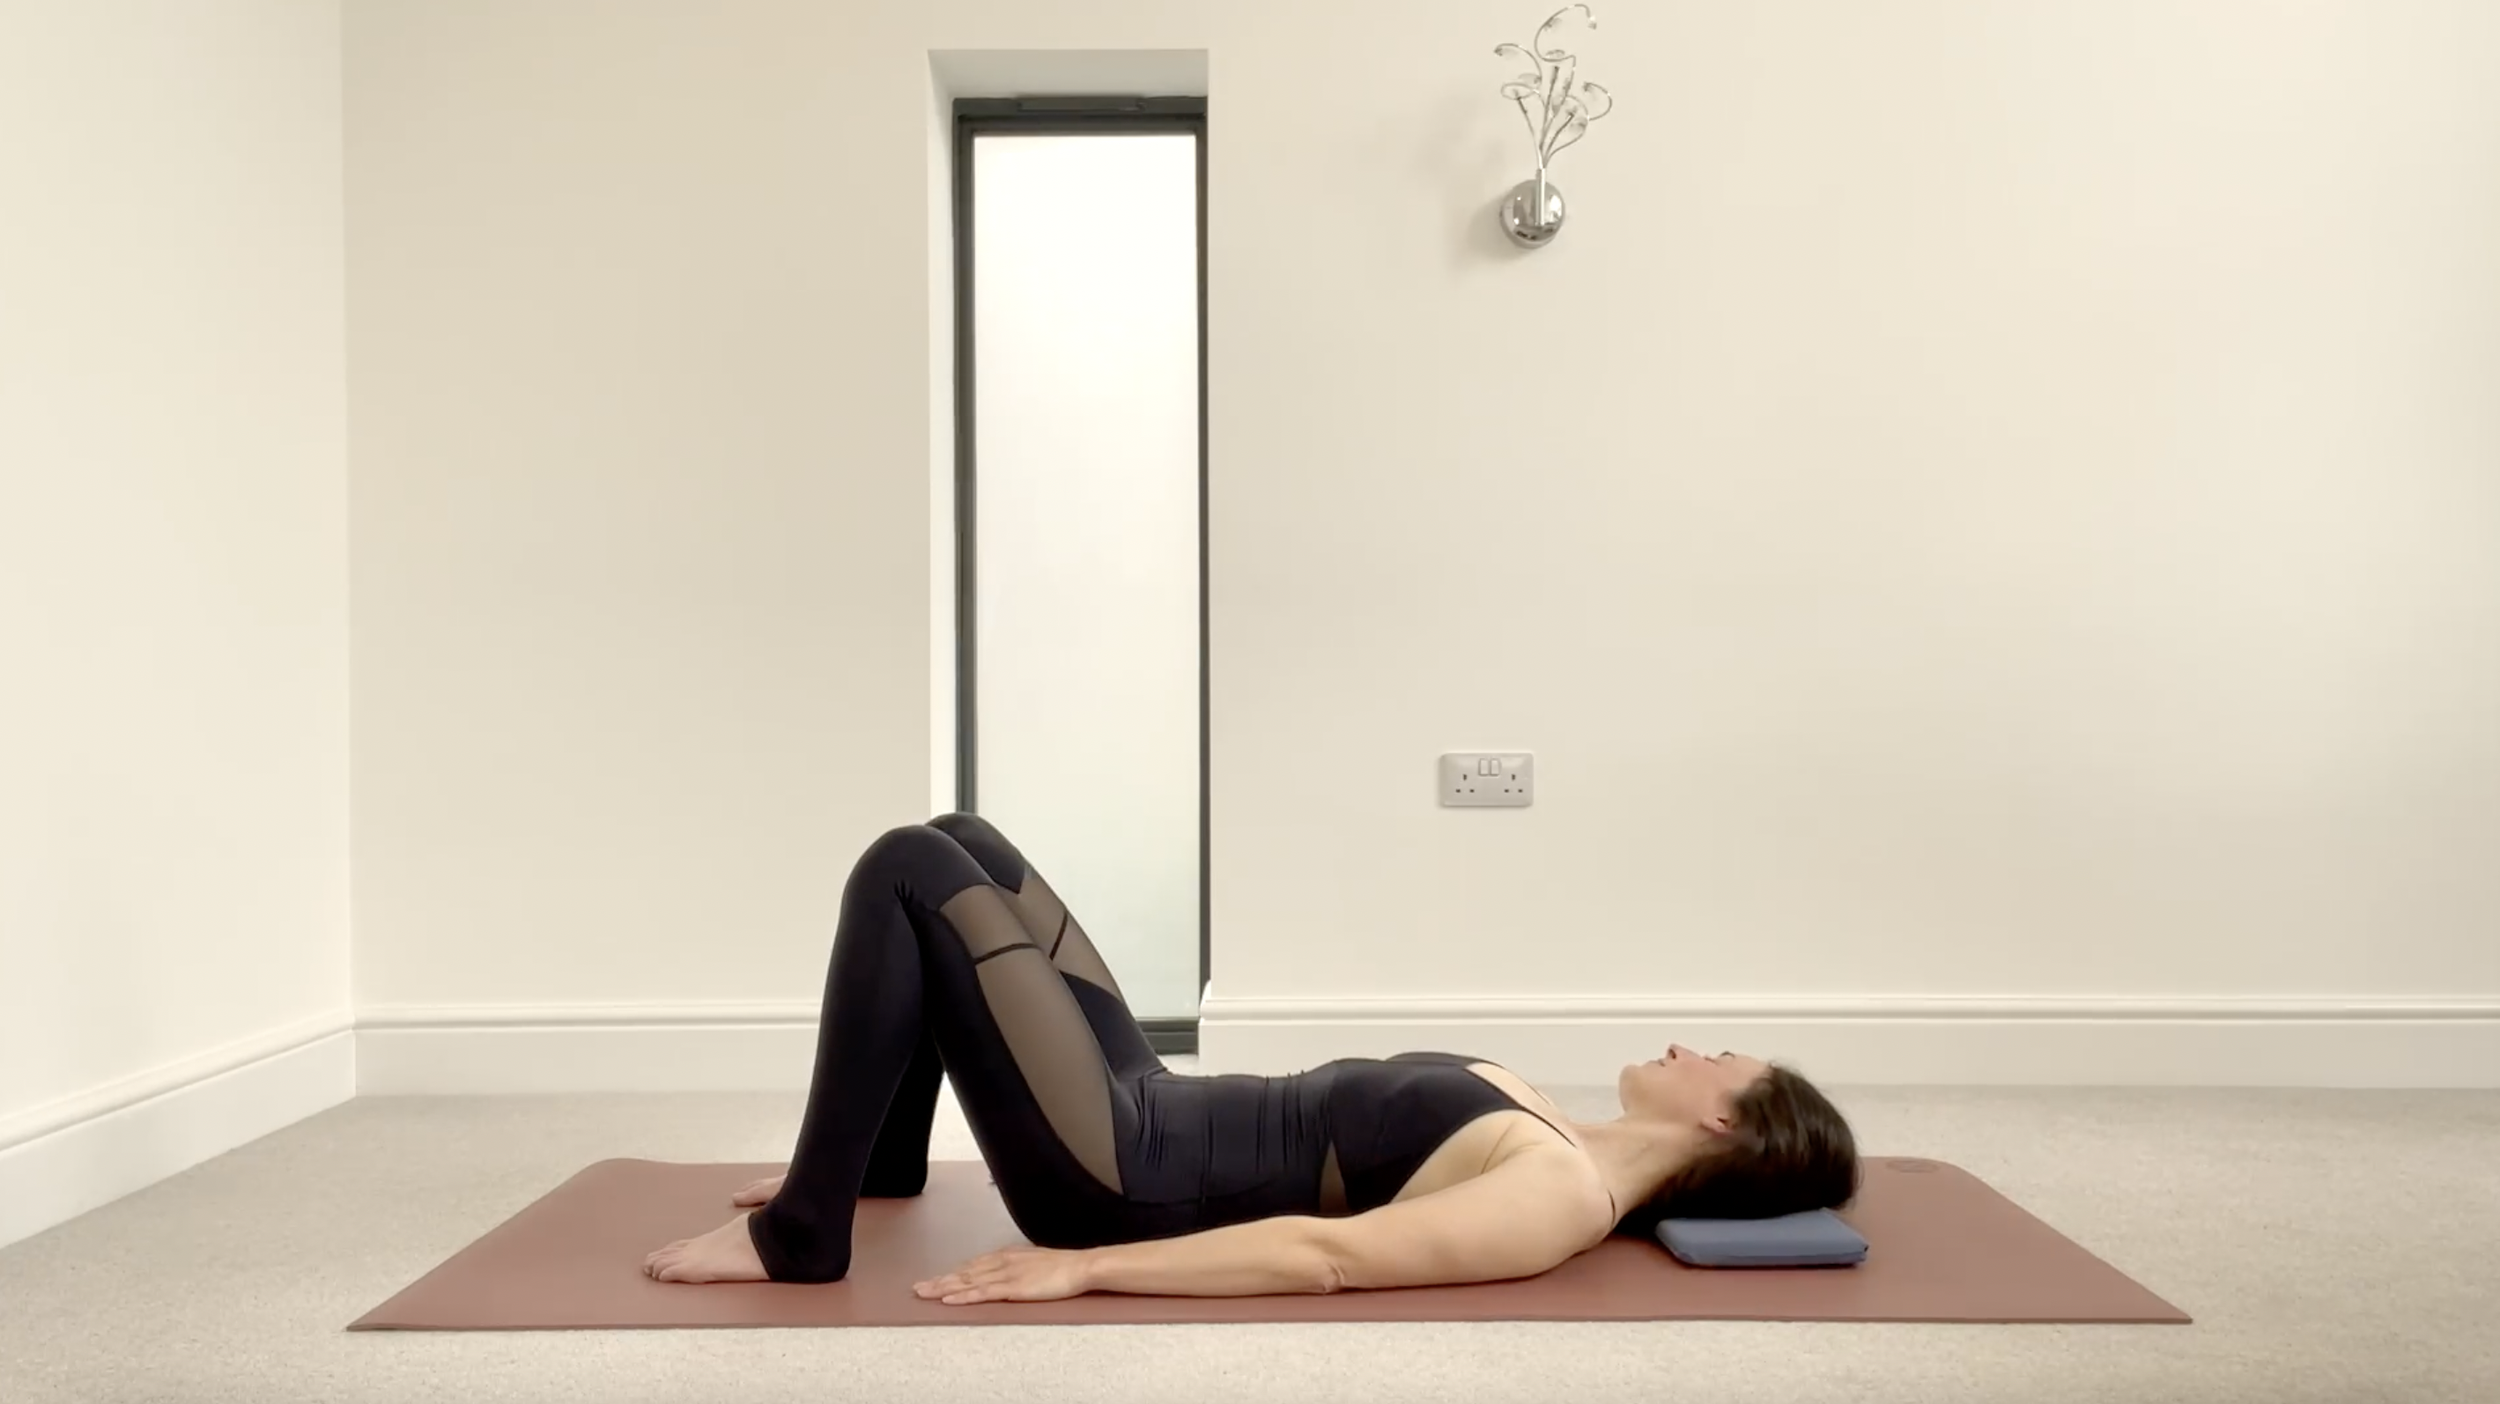
The relaxation position is a fundamental starting position in Pilates that offers excellent support and helps establish proper alignment. It's a great position to begin your Pilates session with. Here's a step-by-step guide on how to get into the relaxation position:
Step 1: Starting position
Lie on your back on a mat, ensuring that your neck is lengthened and released, maintaining the natural curves of your neck. If needed, you can place a small firm flat cushion or folded towel under your head for additional support.
Bend your knees and place the soles of your feet firmly on the mat. Your legs should be hip-width apart and parallel to each other.
Step 2: Arm position options. a) Place your hands on your lower abdomen with your elbows bent, resting on the mat. This arm position promotes relaxation and body awareness. OR b) Extend your arms by the sides of your body on the mat, palms facing down. This arm position prepares you for movement.
Now, let's focus on settling into the relaxation position:
Allow your entire spine to widen and lengthen, feeling supported by the mat.
Bring your attention to three areas of your body weight: the back of your pelvis (sacrum), the back of your ribcage, and your head.
Be aware of the parts of your body that are in contact with the mat and encourage them to feel heavy and supported. You may notice less contact in your lower spine.
Release tension in your thighs and soften the area around your hips.
Pay attention to the width across your chest and allow your breastbone to feel released.
Feel a lengthening sensation in your neck and release any tension in your jaw and the rest of your face.
Allow some time for your body to adapt to this position and for your spine to fully release.
By following these steps and focusing on relaxation and alignment, you can effectively assume the relaxation position in Pilates. This position provides a strong foundation for your practice and helps you establish a mind-body connection as you prepare for your Pilates session.
Finding Neutral
Finding Neutral - The Compass is a valuable exercise for developing awareness of neutral alignment in the pelvis and lower spine. It also serves as an effective way to mobilize and release tension in the lower back. Here's a step-by-step guide on performing this exercise:
Step 1: Starting position
Begin by aligning yourself correctly in the Relaxation Position, lying on your back with your arms extended by your sides on the mat. Visualize a compass on your lower abdomen, with your navel representing the north, your pubic bone representing the south, and the prominent bones of your pelvis on either side representing the west and east.
Now, let's go through the actions involved in finding neutral:
Tilting the pelvis north and south:
Take a deep breath in to prepare your body for movement.
Breathe out as you gently tilt your pelvis to the north, allowing the pubic bone to move forward and upward. As you do this, feel your lower spine releasing into the mat as your pelvis tilts backward.
Breathe in as you continue tilting your pelvis back through the mid-position without pausing, until the pelvis gently tilts forward to the south. In this position, the pubic bone moves backward and downward, causing a slight arch in your lower back.
Repeat this north-south tilting movement five times.
Finding neutral:
Return to the Starting Position after the fifth repetition and focus on finding your neutral position, which lies between the north and south positions. To be sure you have found neutral: bring both thumbs and both index fingers together, place your hands on the lower abdominals and if you are in a true neutral pelvis position your thumbs and index fingers will be horizontally level with each.
Breathe out as you roll your pelvis to the west, feeling the opposite side of the pelvis lift slightly as it rotates.
Breathe in as you continue rolling your pelvis through the mid-position without stopping, moving it to the east. Once again, feel the opposite side of your pelvis lift slightly.
Return to the mid-position, where your pelvis is level and neutral. One should feel equal contact with the mat through both sides of the back of your pelvis.
Here are some important watch points to consider:
Keep the tilting of your pelvis small and effortless. While the rest of your spine will react slightly, avoid overexaggerating the movement.
The final neutral position should feel natural and comfortable, not fixed or rigid.
In neutral, you should feel the back of your pelvis (sacrum) heavy and grounded on the mat.
Allow your hip joints to be free and released, avoiding any unnecessary tension.
By following these steps and keeping the watch points in mind, you can effectively perform the Finding Neutral through The Compass exercise. It will help you cultivate a sense of neutral alignment in your pelvis and lower spine, while also promoting freedom and release in your hip joints.
pelvic stability exercises
In Pilates, pelvic stability exercises are crucial for developing a strong and stable core, improving posture, and enhancing overall body alignment. Here are some basic pelvic stability exercises commonly practiced in Pilates:
Zip and Abdominal Hollowing
Teaches you how to feel and connect to your centre. The self- awareness that this exercise helps develop can be used in all Pilates exercise.
Here's how to perform Zip and Abdominal Hollowing:
Step 1: Starting position
Begin by aligning yourself correctly in the Relaxation Position, place your hands on your lower abdomen with your elbows bent, resting on the mat.
Now, let's go through the actions involved in Zip and Abdominal Hollowing:
Breathe in wide across your back and lengthen your spine.
Breathe out as you 'zip' from the back to the front of your pelvic floor region: first, lifting from your back passage (anus) as if trying to prevent yourself from passing wind, then bringing this feeling forward towards your pubic bone as if trying to stop yourself from passing water. Continue gently to draw up these muscles inside. You should feel your abdominals begin subtly to hollow and tighten automatically.
Continue to breathe out fully as you gently increase the hollowing of the abdominal area but do not over-engage.
Maintain this connection and breathe normally for five breaths before releasing, ensuring that your abdominals and ribs are still able to move with your breath.
Here are some important watch points to consider:
Ensure that you do not zip, pull up, or pull in, too hard. It is very important that you do not force this action by gripping.
Make sure that your buttock muscles remain relaxed throughout.
Keep your chest and the front of your shoulders open and avoid any tension in your neck area.
Keep your breathing smooth and evenly paced.
Ensuring that your ribage and abdominal area are still able to expand with your in-breath is a good sign that you haven't over engaged.
If you lose any of the connections, relax and start again from the beginning.
If you find the 'zip' part too difficult, don't worry: it will come eventually. It may be easier to focus on simply scooping the abdominals, drawing them lightly back towards the spine. Above all what matters is that you are in control of your body as you move to avoid injury. This will become automatic as you practise more.
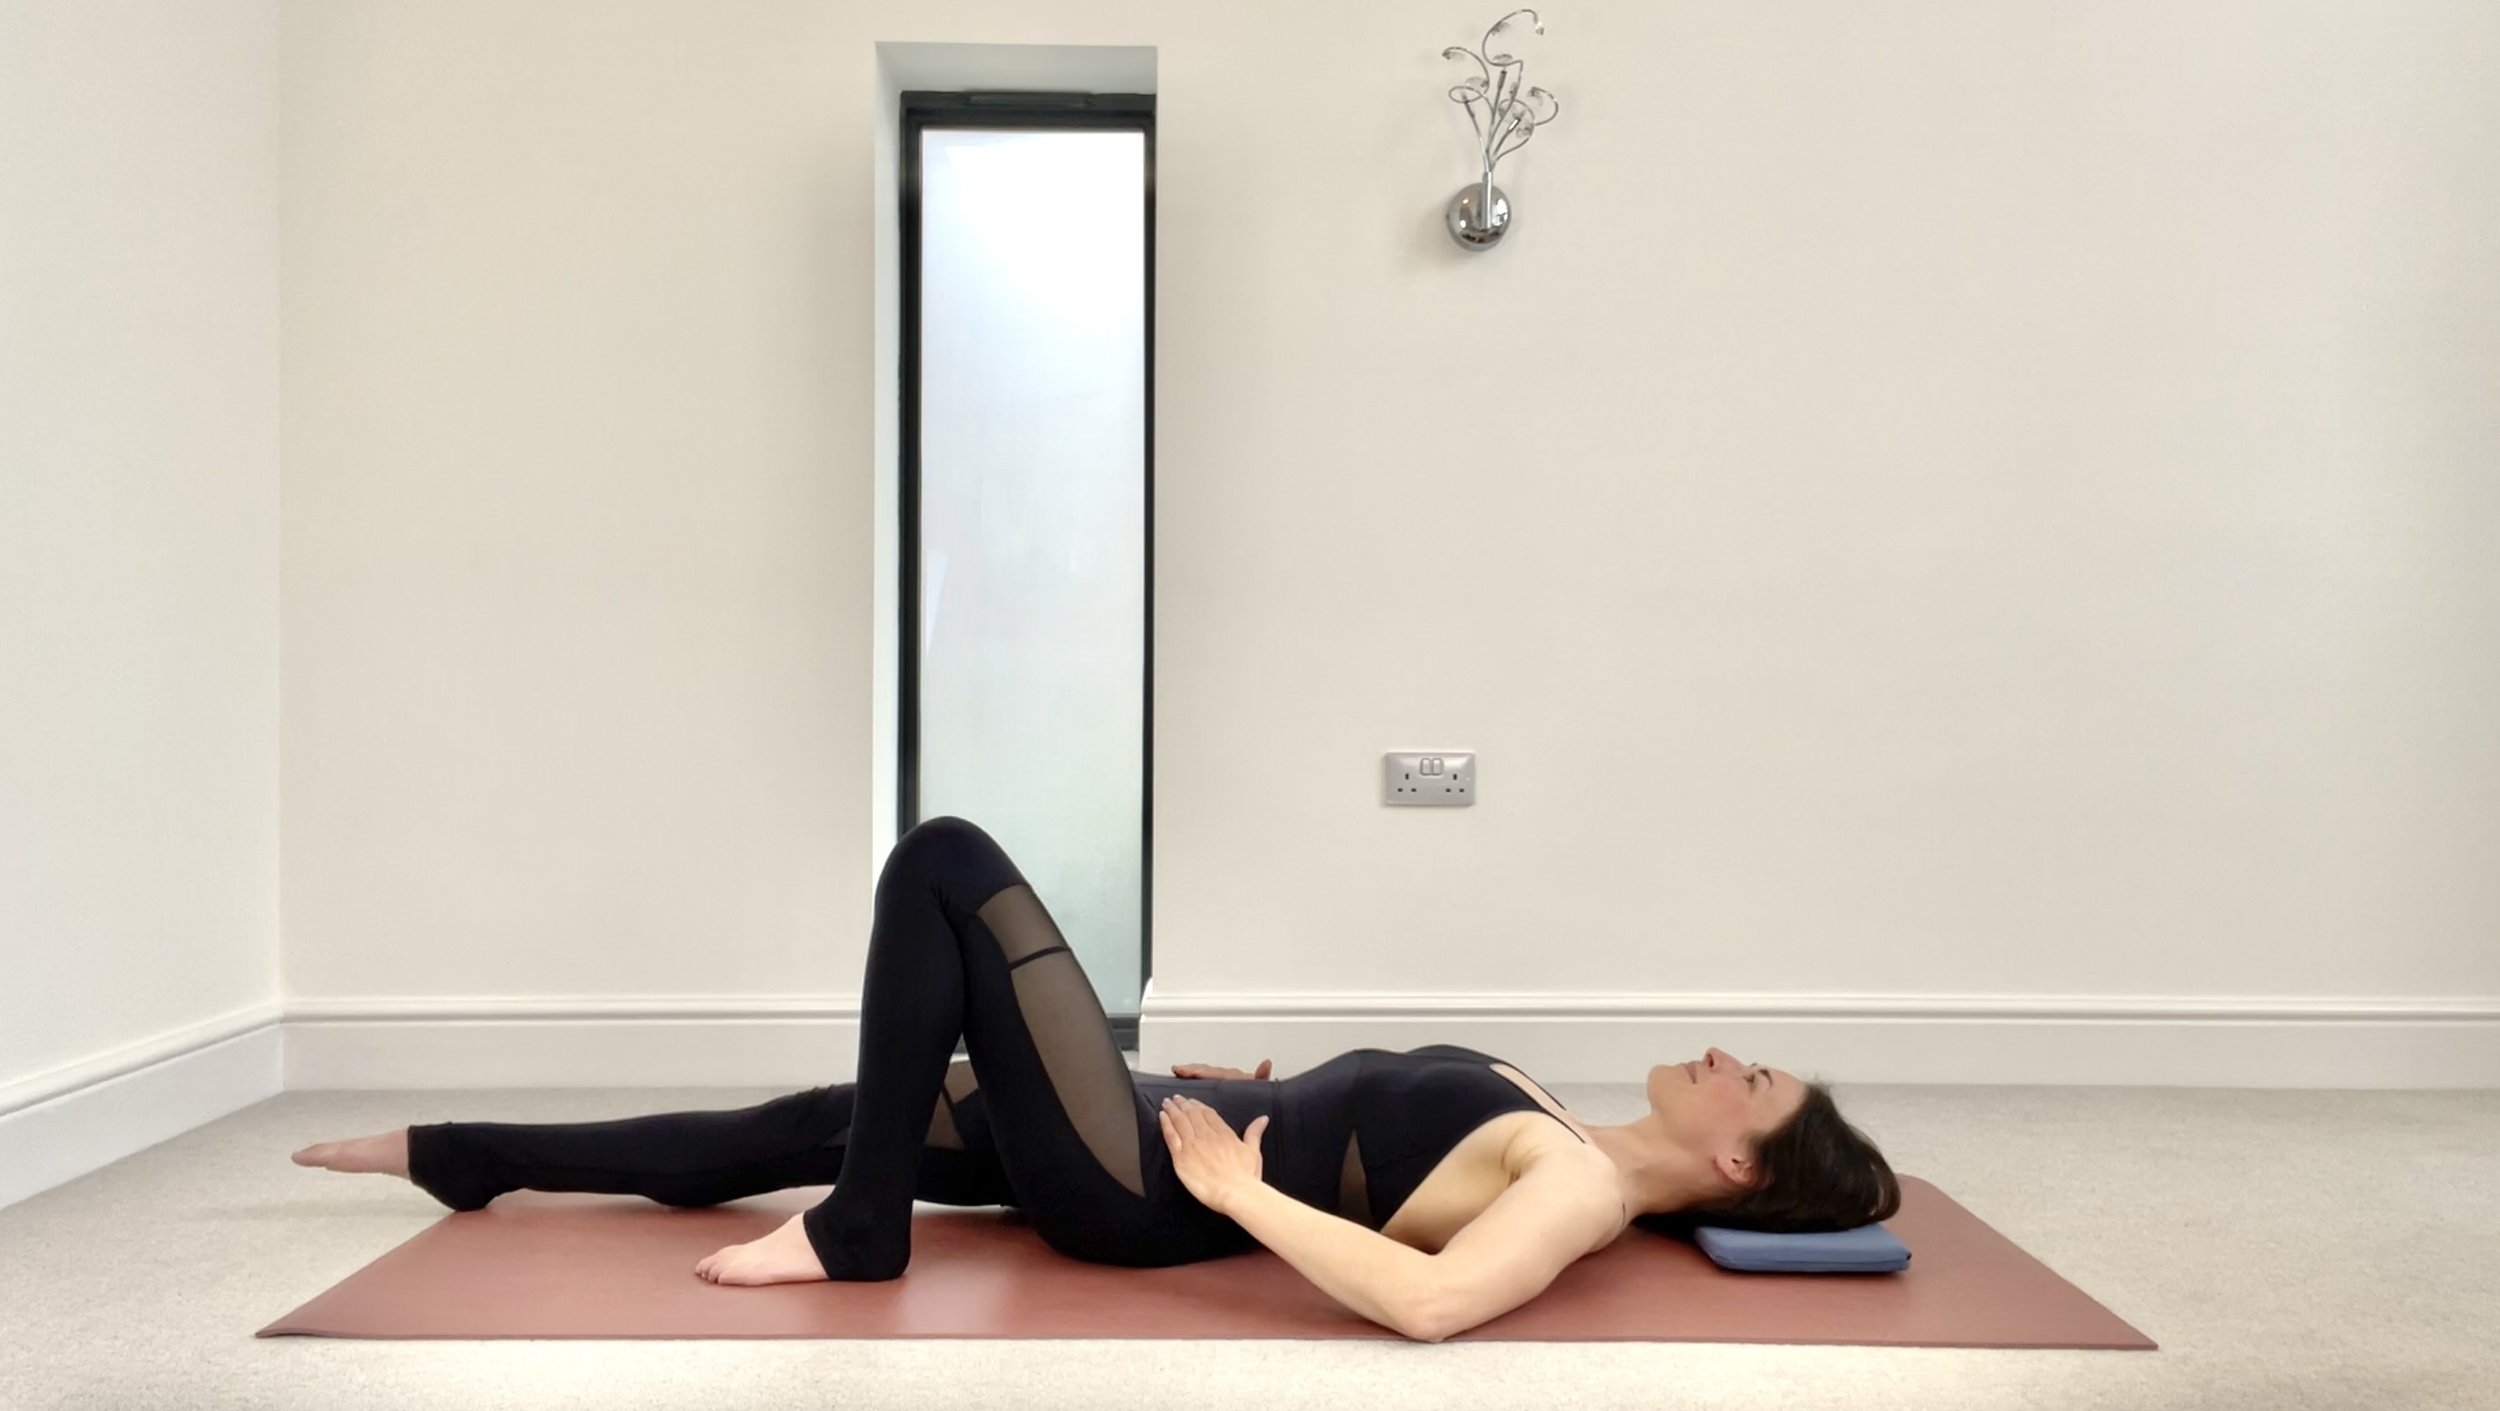
Leg Slides
Leg Slides in Pilates are an exercise that targets the hip muscles, enhances pelvic stability, and improves overall body control.
Here's how to perform Leg Slides:
Start by lying on your back with your knees bent and feet flat on the mat. Keep your arms relaxed by your sides. (However to begin with, you may want to place your hands on your pelvis to check for unwanted movement).
Breathe in, preparing your body to move.
Breathe out as you gently connect to your centre by applying the Zip and Abdominal Hollowing (explained above). Maintain an appropriate level of connection to your centre throughout.
Take a deep breath to prepare, and as you exhale, slide one leg along the mat, extending it straight while maintaining stability in the pelvis and a neutral spine.
Inhale as you smoothly return the leg back to the starting position, maintaining control and awareness of your movements.
Repeat the exercise with the other leg, sliding it along the mat while keeping the pelvis stable and the core engaged.
When performing Leg Slides, pay attention to the following key points:
Maintain a stable pelvis throughout the movement, avoiding any excessive tilting or movement in the hips.
Keep your core muscles activated to provide support and stability to the spine and pelvis.
Focus on lengthening through the extended leg while maintaining proper alignment and control.
Breathe naturally throughout the exercise, coordinating your breath with the movement.
Leg Slides help strengthen the hip stabilizer muscles, including the hip abductors and adductors, which play a vital role in maintaining pelvic stability and proper alignment. This exercise also enhances body awareness, promotes balanced muscle development, and contributes to overall control and coordination.
Knee Openings
Knee Openings are a valuable exercise in Pilates that help you focus on maintaining stability between the pelvis and spine, while promoting independent movement of your leg at the hip joint. They also help to improve hip mobility and strengthen the hip muscles.
Here's how to perform Knee Openings:
Begin by lying on your back with your knees bent and feet flat on the mat, hip-width apart.
Keep your arms relaxed by your sides. (However to begin with, you may want to place your hands on your pelvis to check for unwanted movement).
Breathe in, to prepare.
Breathe out as you gently connect to your centre by applying the Zip and Abdominal Hollowing (explained above). Maintain an appropriate level of connection to your centre throughout.
Breathe in, preparing your body to move and maintaining the connection to your centre.
Breathe out as you allow one knee to open slowly to the side, keeping the foot down on the mat but allowing the foot to roll to its outer side. Open as far as you can without moving the pelvis.
Breathe in as you bring the knee back to the Starting Position.
ontinue alternating sides, ensuring a smooth and controlled motion.
Repeat five times with each leg
When performing Knee Openings, keep the following tips in mind:
Keep your pelvis and spine still and centred throughout. Focus on your leg moving in isolation from the rest of your body.
Move your leg as far as you can without disturbing the pelvis and losing neutral.
Focus on your waist remaining long and even on both sides.
Keep your chest and the front of your shoulders open and avoid any tension in your neck area.
Remain still in the supporting leg, without tension.
Knee Openings in Pilates help enhance hip mobility, particularly in the external rotation of the hips. They engage the hip abductors muscles which contribute to improved stability and proper alignment of the pelvis. This exercise also enhances body awareness, promotes balanced muscle development, and contributes to overall control and coordination.
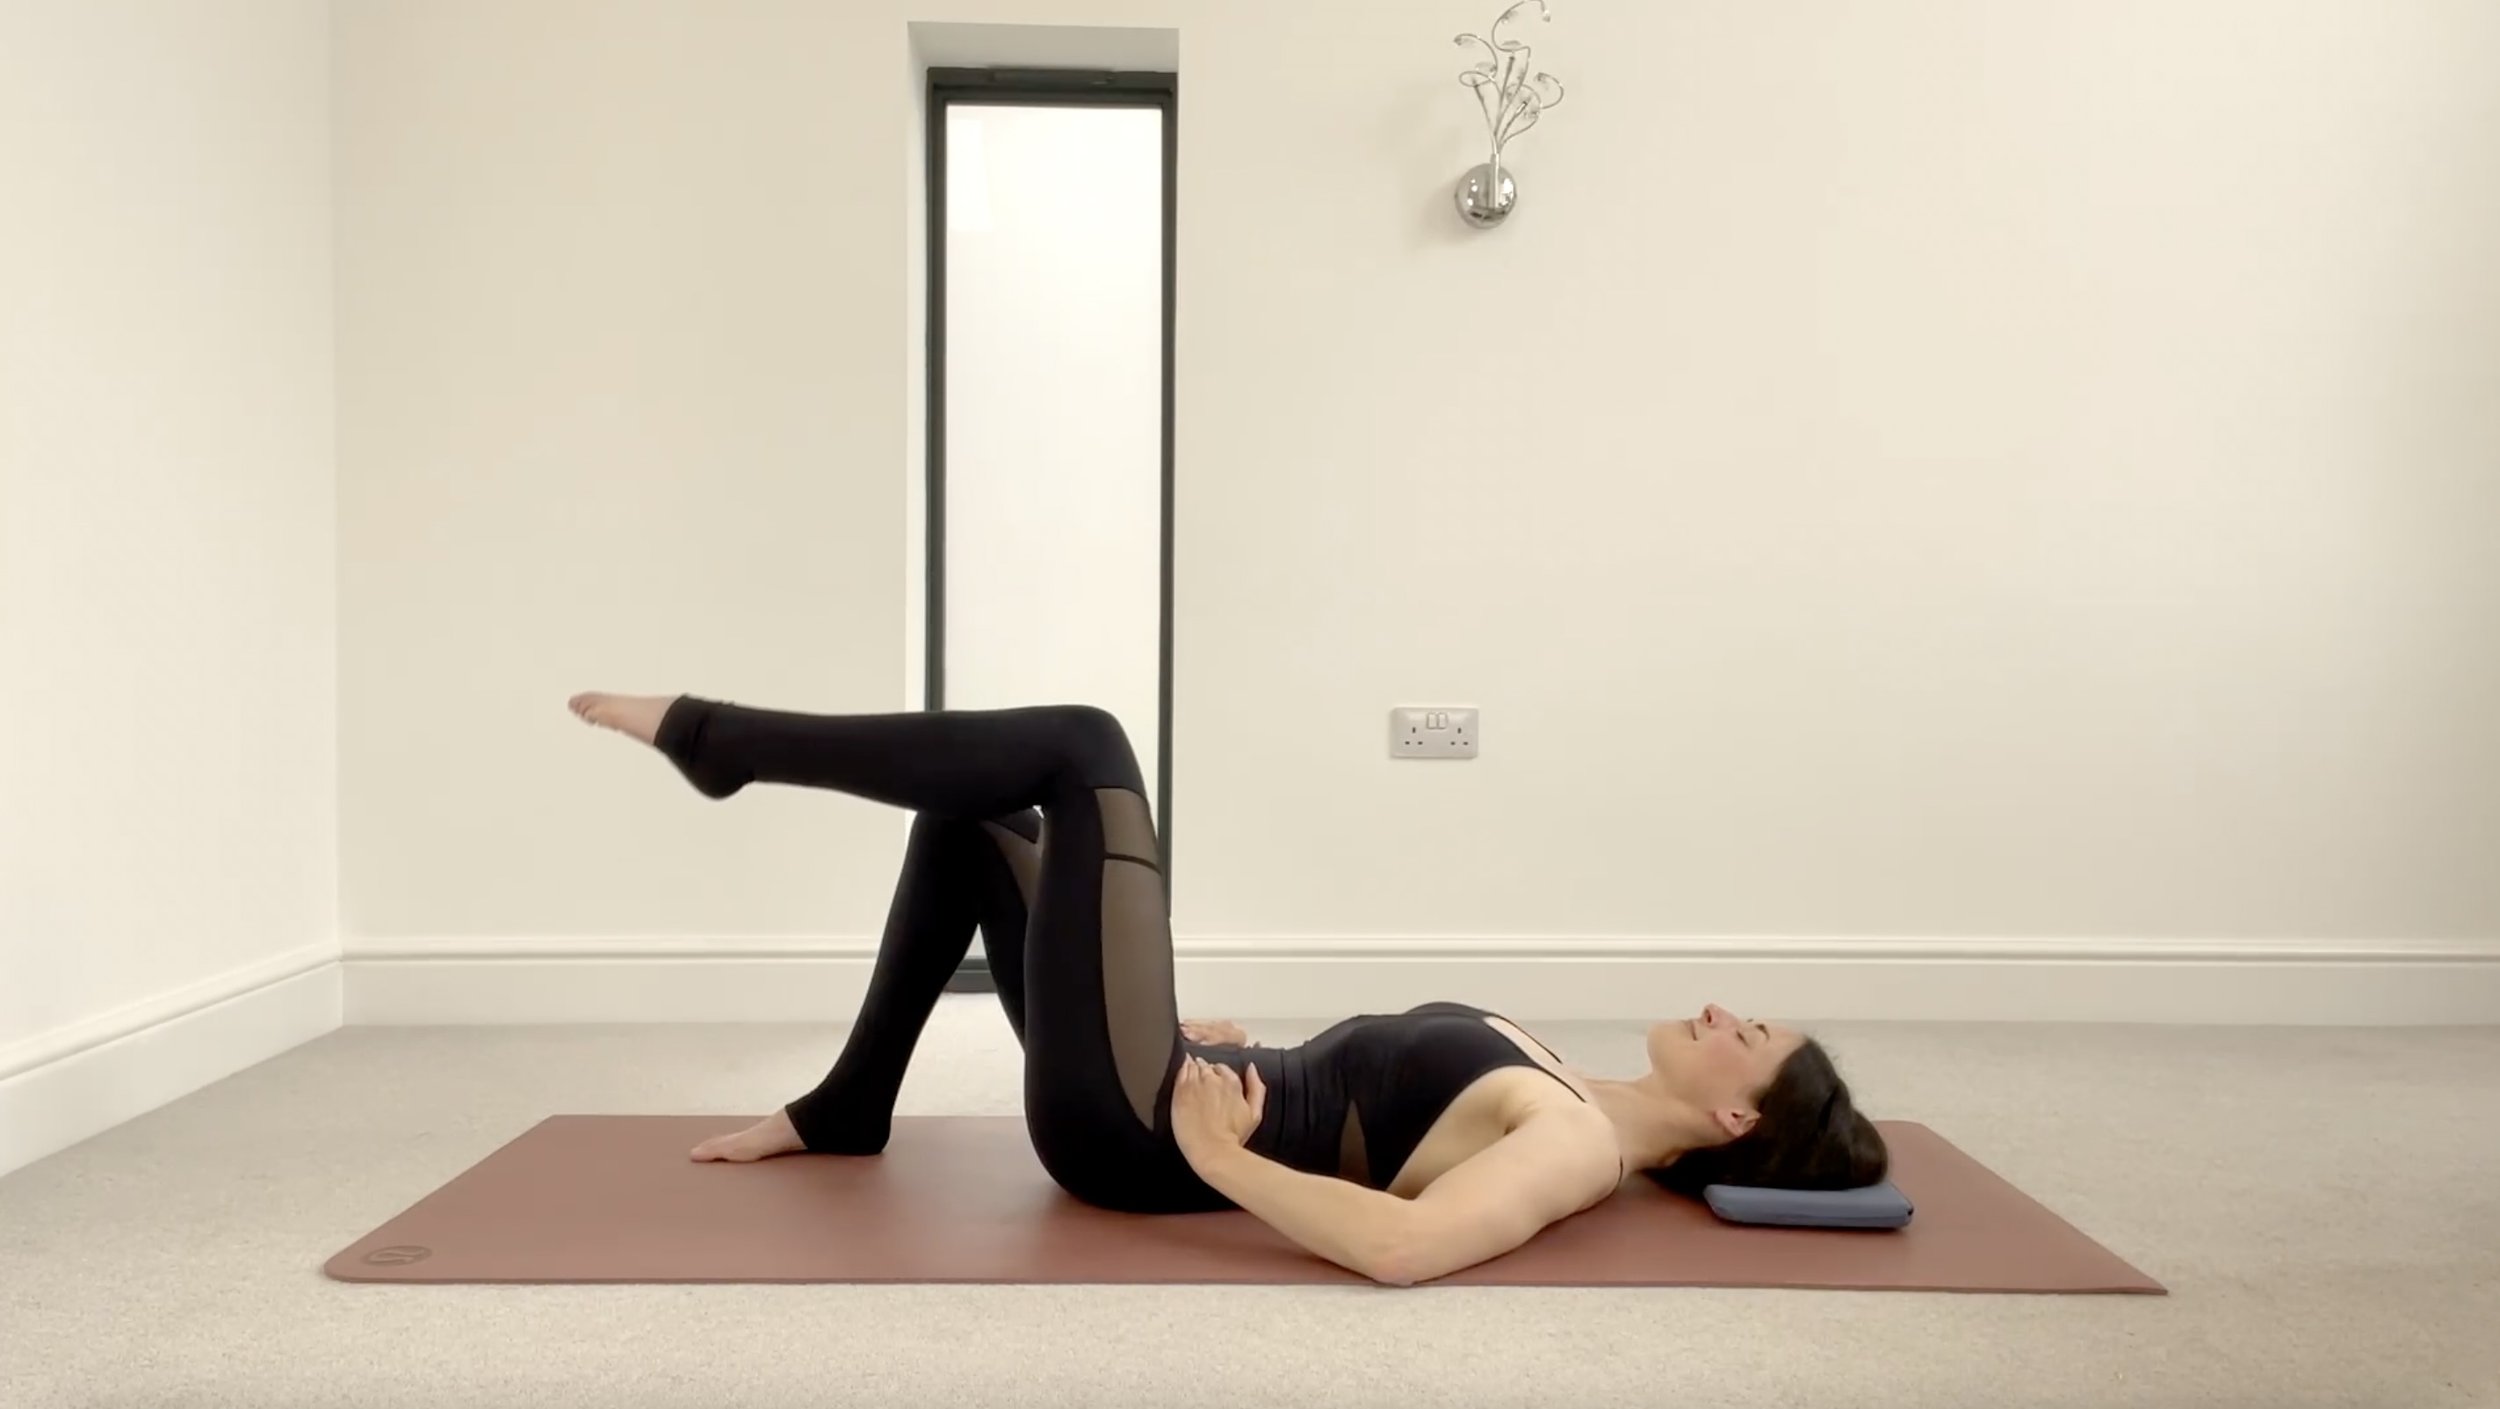
Single Knee Folds
Single Knee Folds target the abdominal muscles, particularly the deep core muscles, while also working on pelvic stability and hip mobility.
Here's how to perform Single Knee Folds:
Begin by lying on your back with your knees bent and feet flat on the mat. Keep your arms relaxed by your sides. (However to begin with, you may want to place your hands on your pelvis to check for unwanted movement.)
Breathe in, to prepare.
Breathe out as you gently connect to your centre by applying the Zip and Abdominal Hollowing (explained above). Maintain an appropriate level of connection to your centre throughout.
Breathe in, preparing your body to move and maintaining the connection to your centre.
Breathe out as you lift your right foot off the mat and fold the knee up towards your body. Allow the weight of the leg to drop down into your hip socket and remain grounded in your pelvis and long in your spine.
Breathe in, maintaining a stable pelvis and neutral spine.
Breathe out as you slowly return the leg back down and your foot to the mat, maintaining control and engaging the core.
Continue alternating between the two legs.
Repeat five times with each leg.
As you perform Single Knee Folds, focus on the following key points:
Keep your pelvis stable and avoid any excessive movement or tilting.
Maintain a neutral spine, avoiding any arching or flattening of the lower back.
Engage your deep core muscles throughout the exercise to support and control the movement.
Breathe naturally, coordinating your breath with the movement.
Single Knee Folds provide a gentle yet effective way to strengthen the abdominal muscles, promote pelvic stability, and improve hip mobility. They can be incorporated into your Pilates routine as part of a comprehensive core workout or used as a warm-up exercise.
Chin Tucks and Neck Rolls
Chin tucks and neck rolls are two exercises commonly performed in Pilates to release tension, improve neck mobility, and promote proper alignment in the cervical spine.
Chin Tucks
Here’s how to perform Chin Tucks:
Start by lying on your back with your knees bent and feet flat on the mat. Keep your arms relaxed by your sides.
Breathe in, preparing your body to move.
Breathe out as you lengthen the back of the neck, tipping your chin down. Be sure to keep your head in contact with the mat.
Breathe in as you tip your head back gently, passing through the mid-position without stopping. Once again, keep the back of the head in contact with the mat; this is a small and subtle movement.
Repeat the Chin Tuck five times and then find the mid-position. This is neutral, with your face and your focus both directed towards the ceiling.
Chin tucks in Pilates help strengthen the deep neck flexors and promote proper alignment of the cervical spine, which can alleviate neck tension and improve posture.
Neck Rolls
Here’s how to perform Neck Rolls:
Start by lying on your back with your knees bent and feet flat on the mat. Keep your arms relaxed by your sides.
Breathe in, preparing your body to move.
Breathe out, roll your head to one side. Again, make sure that you keep your head in contact with the mat.
Breathe in as you roll your head back to the centre.
Repeat the Neck Roll up to five times each side before returning your head to the central neutral position.
Neck rolls in Pilates help improve neck mobility, release tension in the neck and upper back muscles, and promote a sense of relaxation and flexibility.
During both the Chin tucks and neck rolls exercises, it's important to remember the following tips:
Keep your movements slow, controlled, and within a comfortable range of motion.
Maintain an lengthened spine throughout the exercises.
Avoid any sudden or jerky motions that may cause strain or discomfort.
Listen to your body and modify the exercises as needed to suit your individual flexibility and comfort level.
Shoulder Drops
Shoulder Drops are a beneficial exercise in Pilates that help release tension in the shoulders and improve shoulder mobility.
Here's how to perform Shoulder Drops:
Start by lying on your back with your knees bent and feet flat on the mat. Raise both arms vertically above your chest, shoulder-width apart, palms facing one another.
Maintain an appropriate level of connection to your centre throughout.
Breathe in as you reach one arm up towards the ceiling, peeling the shoulder blade away from the mat.
Breathe out as you gently release the arm back down, returning the shoulder blade back onto the mat.
Repeat up to ten times, alternating arms.
When performing Shoulder Drops, keep the following tips in mind:
Keep your pelvis and spine stable and still throughout.
Keep your neck long and free from tension; your head remains still and heavy throughout.
Use the breathing pattern to guide your movements:
The inhalation encourages the ribcage to widen and the shoulder blades to glide.
The exhalation encourages a release of tension.
Fully lengthen your arms but avoid locking your elbows.
Shoulder Drops in Pilates help release tension that often accumulates in the shoulders and upper back due to poor posture or stress. They promote proper alignment, improve shoulder mobility, and enhance overall body awareness.
Spine Curls
Spine Curls are a fundamental exercise in Pilates that help improve spinal mobility, strengthen the core, and promote spinal alignment.
Here's how to perform Spine Curls:
Start by lying on your back with your knees bent, feet hip-width apart, and arms relaxed by your sides.
Maintain an appropriate level of connection to your centre throughout.
Take a in breath to prepare.
As you exhale, begin to articulate your spine, lifting your tailbone off the mat, followed by each vertebrae, until your entire spine is off the mat.
Continue to lift until you reach a bridge position, where your knees, hips, and shoulders form a straight line.
Inhale at the top of the bridge position, maintaining stability and engaging your glutes and core.
Exhale as you begin to roll the spine back down to the mat, articulating each vertebrae in a controlled manner until your spine is back in a neutral position.
Repeat the movement for six repetitions, focusing on smooth and controlled motion throughout.
When performing Spine Curls, keep the following tips in mind:
Focus on wheeling your spine off the mat vertebra by vertebra.
Control the sequential return of your spine back down to the mat.
Avoid rolling up too far, maintain the connection of your ribs to your pelvis and avoid arching your spine.
Ensure there is equal weight through both feet; this will help to prevent your pelvis dipping to either side.
Try to avoid 'hitching' your pelvis up towards your ribcage.
Spine Curls in Pilates help improve spinal mobility, strengthen the deep core muscles, and promote proper alignment and articulation of the spine. They also contribute to increased body awareness and can alleviate tension in the lower back.
Ribcage Closure
Ribcage Closure is a beneficial exercise in Pilates that focuses on improving core stability, enhancing postural alignment, and promoting a sense of control and support through the ribcage.
Here's how to perform Ribcage Closure:
Start by lying on your back with your knees bent, feet hip-width apart, and arms relaxed by your sides.
Maintain an appropriate level of connection to your centre throughout.
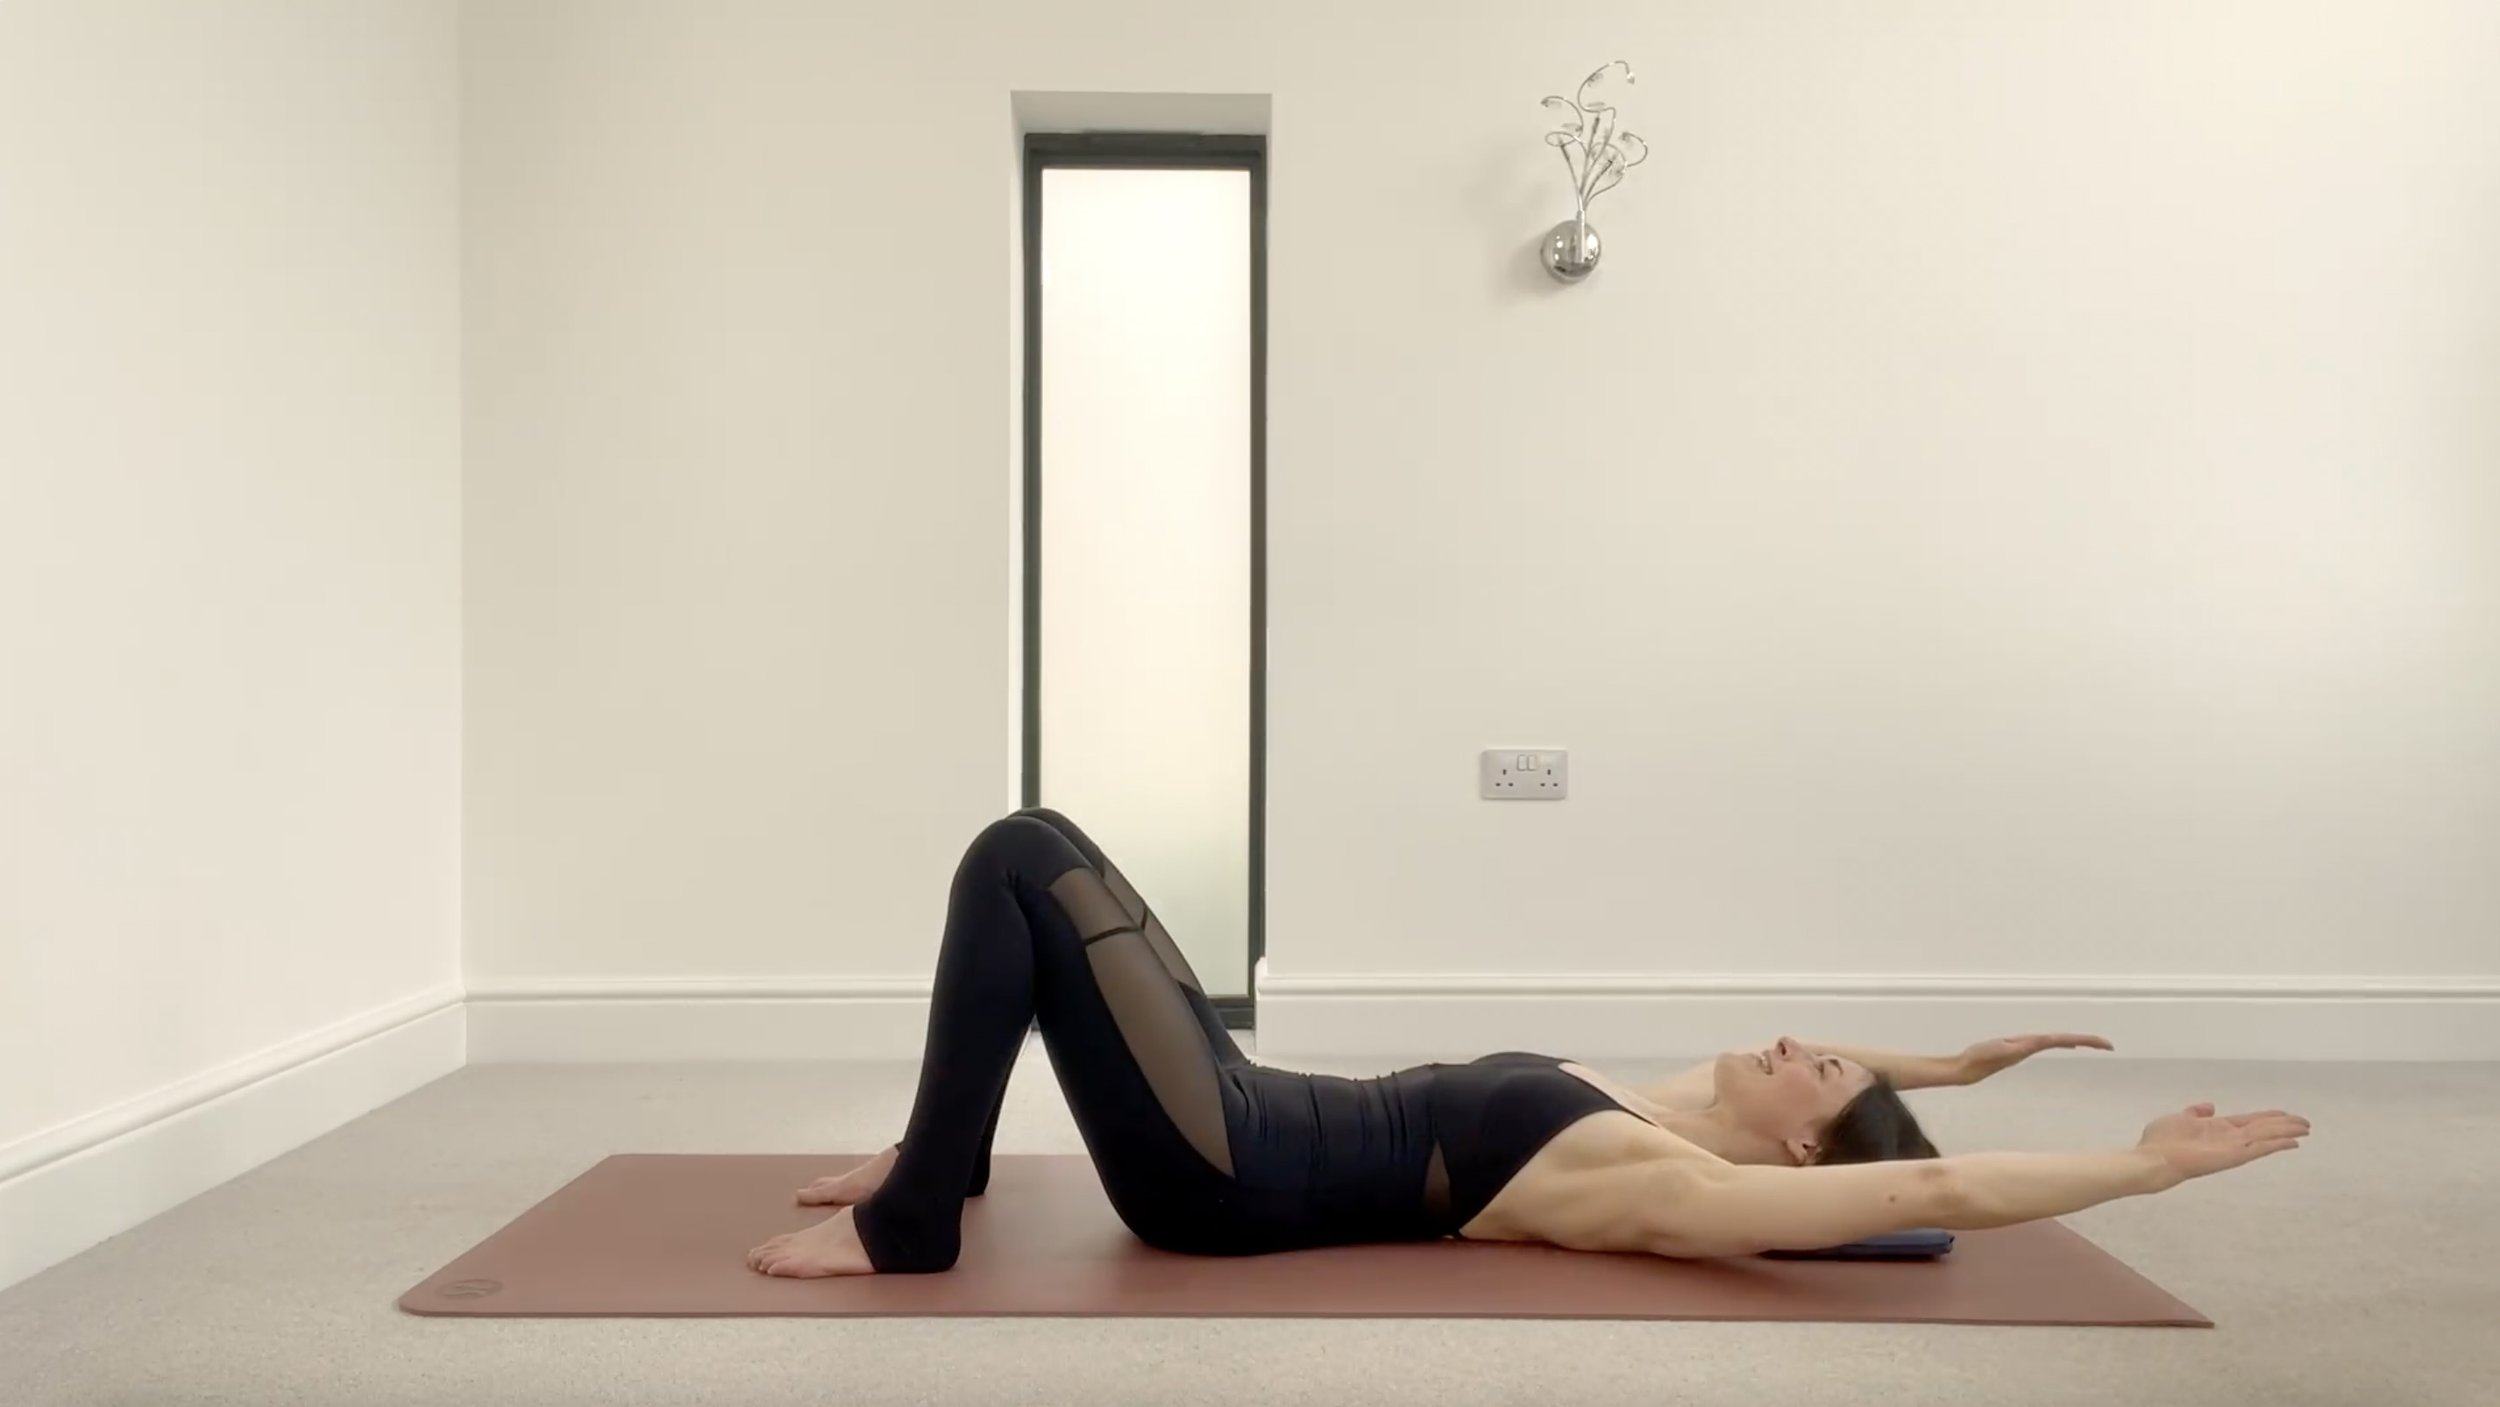
Breathe in and raise both arms to a vertical position above your chest, palms facing forwards.
Breathe out. Maintaining a stable and still spine, reach both arms overhead towards the floor. Keep your neck long and encourage the softening and the closing of the ribcage during this exhalation.
Breathe in as you return the arms above your chest. Feel your ribcage heavy and your chest open.
Breathe out and lower the arms, returning them to the mat and lengthening them by the sides of your body.
Repeat ten times, ensuring smooth and controlled movements.
When performing Ribcage Closure, keep the following tips in mind:
Keep your pelvis and spine stable and still throughout.
Be particularly careful not to allow your upper spine to arch as you reach your arms overhead.
Although your shoulder blades will naturally glide upwards on the back of your ribcage as your arms rise, do not over-elevate your shoulders.
It is equally as important not to depress your shoulders down your back; simply allow them to move naturally and without tension.
Fully lengthen your arms but avoid locking your elbows.
Keep your neck long and free from tension.
Ribcage Closure in Pilates helps activate and strengthen the deep core muscles, including the transverse abdominis and obliques. It promotes proper alignment, enhances postural control, and contributes to overall core stability.
Hip Rolls With Feet Down
Hip Rolls with feet down are a beneficial exercise in Pilates that target the core muscles, improve spinal mobility, and enhance pelvic stability.
Here's how to perform Hip Rolls with feet down:
Start by lying on your back with your knees bent, bring your legs together and connect your inner thighs. ( You may wish to place a cushion between your knees to encourage the inner thigh connection.)
Reach your arms out on the mat slightly lower than shoulder height with your palms facing upwards.
Maintain an appropriate level of connection to your centre throughout.
Breathe in and, maintaining the connection of the inner thighs, begin to rotate your pelvis and legs to the Left from a strong centre. The right side of the pelvis and the lower right ribs will peel slightly off the mat.
Breathe out, initiating the movement from the connection in your centre, as you return the pelvis and legs back to the Starting Position.
Repeat 10 tens, alternating sides.
When performing Hip Rolls with feet down, keep the following tips in mind:
Roll your pelvis and your legs directly to the side and avoid any deviation; there should be no shortening on either side of the waist.
Maintain a connection between your ribcage and your pelvis and ensure that you don't arch your back as you roll.
Control the movement of your legs and don't just allow them to 'drop'.
Ensure the foot that is on top peels away from the mat during the roll.
Keep your chest and the front of your shoulders open and avoid any tension in your neck area.
Hip Rolls with feet down in Pilates help improve spinal mobility, strengthen core muscles, and promote proper alignment and control of the pelvis. They also contribute to increased body awareness and can alleviate tension in the lower back.
Guidelines and Recommendations for Postnatal Pilates
1. Consult with Your Healthcare Provider
Before starting any postnatal exercise program, it's essential to consult with your healthcare provider, particularly if you had a complicated pregnancy or delivery. Your healthcare provider can assess your individual needs, provide specific recommendations, and address any concerns you may have.
2. Wait for the Right Time
Give yourself sufficient time to recover postpartum before diving into Pilates. Generally, it's recommended to wait until your healthcare provider gives you the green light, typically around six weeks after a vaginal delivery and longer for a cesarean section. Listen to your body and start Pilates when you feel physically ready.
3. Gradual Progression is Key
Begin with gentle, low-impact exercises that focus on rebuilding your core strength and pelvic floor, such as the exercise found above. Progress gradually, gradually increasing the intensity and complexity of exercises as your body becomes stronger and more resilient. Respect your body's limits and avoid overexertion or pushing yourself too hard too soon.
4. Prioritise Core and Pelvic Floor Exercises
Postnatal Pilates places significant emphasis on rebuilding core strength and pelvic floor function. Focus on exercises that target these areas, such the Zip and Abdominal Hollowing engagement. These exercises lay the foundation for overall stability and support as you progress.
5. Mindful Breathing
Incorporate mindful breathing techniques into your Pilates practice. Deep diaphragmatic breathing promotes relaxation, improves oxygenation, and enhances mind-body connection. Coordinate your breath with the movements, inhaling during the preparatory phase and exhaling during the exertion phase of each exercise.
6. Listen to Your Body
Pay close attention to how your body feels during and after each exercise. If something feels uncomfortable, painful, or causes any unusual symptoms, stop immediately and consult your healthcare provider or pilates instructor. Honor your body's signals and modify or skip exercises as needed.
7. Stay Hydrated and Well-Nourished
Maintain proper hydration before, during, and after your Pilates sessions. Also, ensure you're fueling your body with nutritious foods to support your postpartum recovery and energy levels. Adequate hydration and nourishment are crucial for your overall well-being and the quality of your Pilates practice.
8. Be Patient and Kind to Yourself
Remember, postnatal recovery is a gradual process, and each person's journey is unique. Be patient with yourself and celebrate the progress you make along the way, no matter how small. Embrace the opportunity to reconnect with your body and enjoy the mental and physical benefits that Pilates can bring.
By following these guidelines and recommendations, you'll embark on a safe and rewarding postnatal Pilates journey, reclaiming your strength, vitality, and confidence as a new mum. Enjoy the process, and remember to prioritise self-care throughout your postpartum recovery.
